Archive 01
Tarkine - modelling complete
16 July 2023
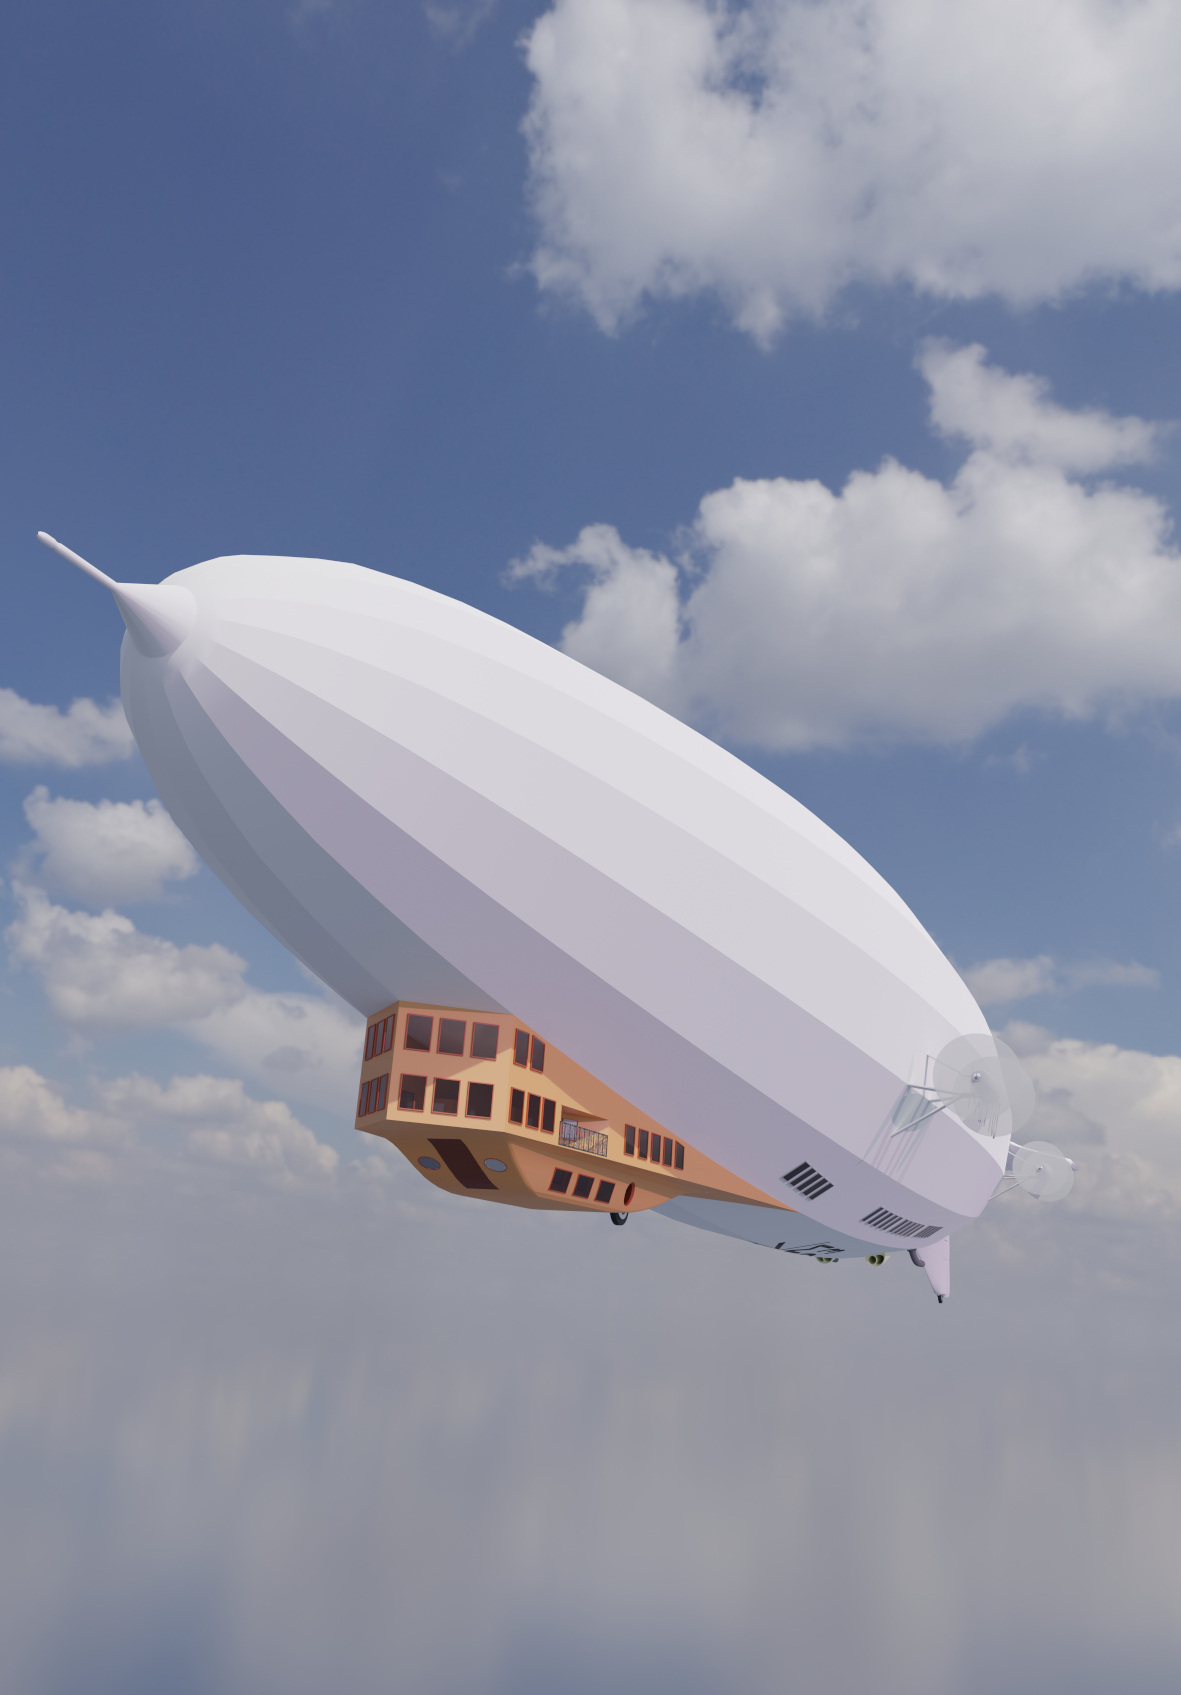
You have to learn to stop fiddling! I applied all the mirror modifiers for Tarkine, and tidied up the file, getting rid of spares and construction pieces. Then you look at it and start noticing little imperfactions - and start fiddling! Anyway, I did smooth out a couple of things that popped up after the mirrors were applied. The skin surface is a bit rough in places but that is OK - aircraft from the 1930s, after a few years of flying, did look a bit battered. They were never perfectly smooth.
Then I produced one of those little spinning videos. The trick I found is to add an empty at the point where you want you model to spin, then parent all the parts of your model to that empty - then set up the rotation on the empty. That way all the parts of your model move in the right way relative to each other. There are many good videos on this - have a look.
Tarkine is whole
8 July 2023
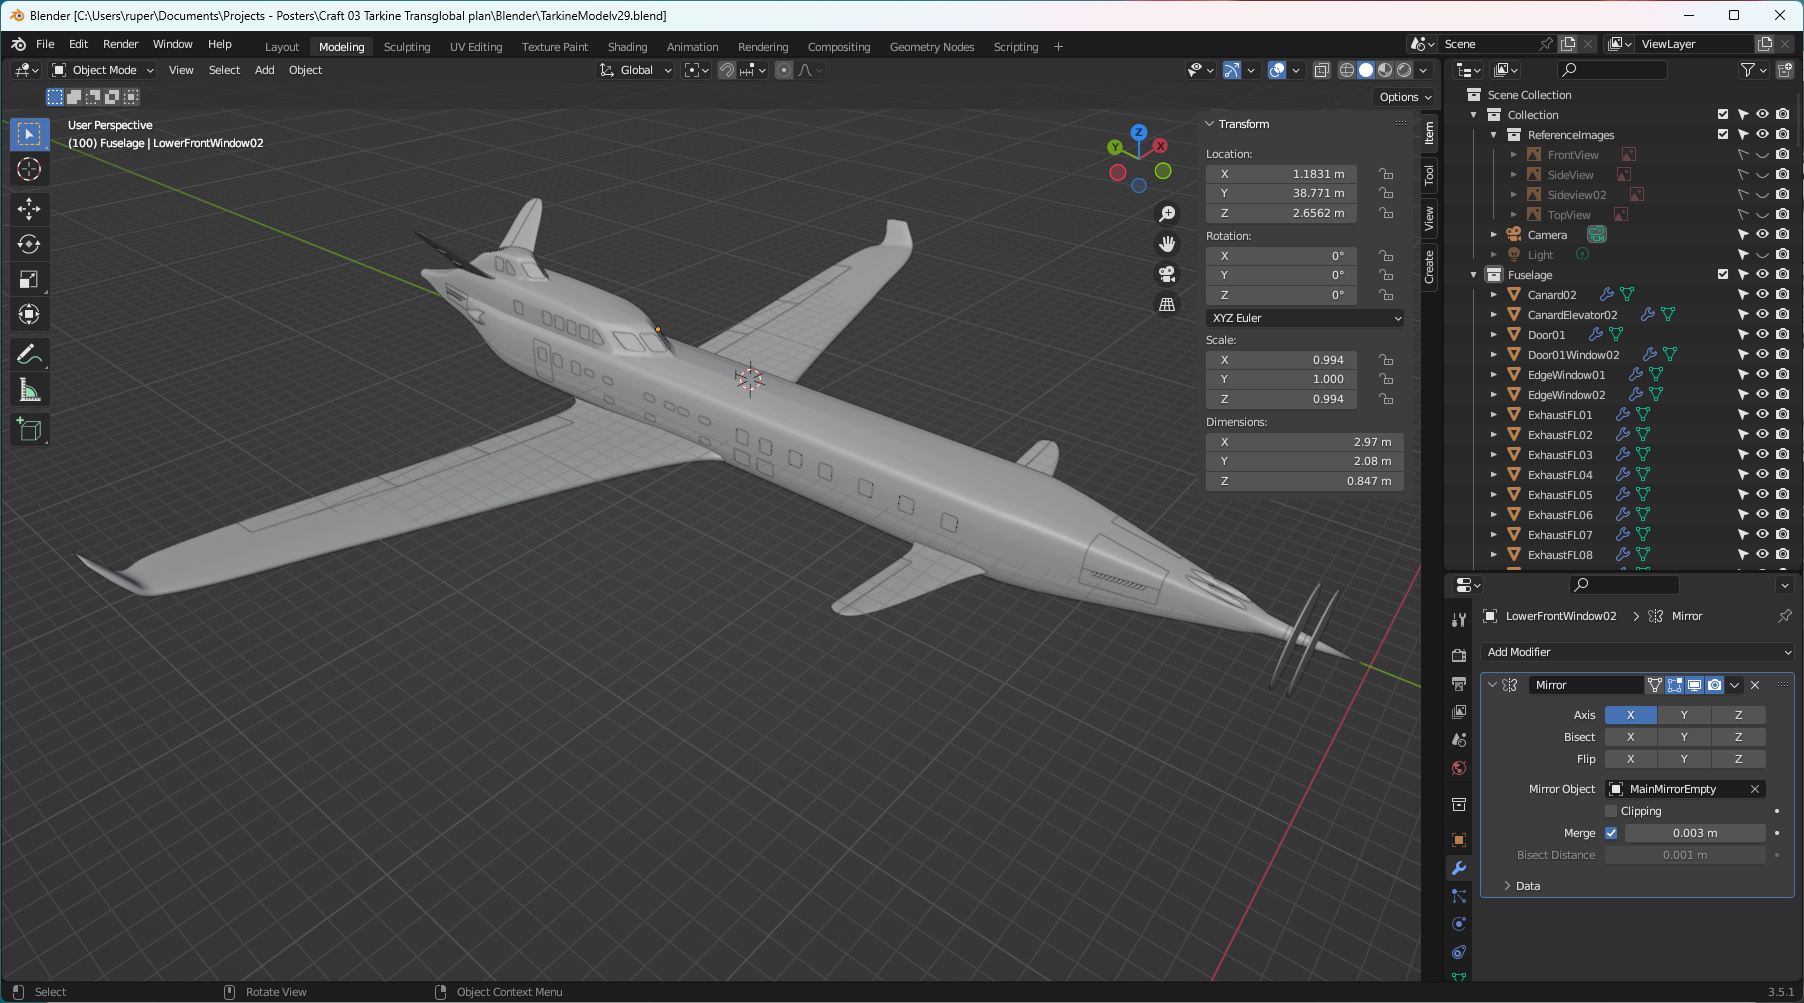
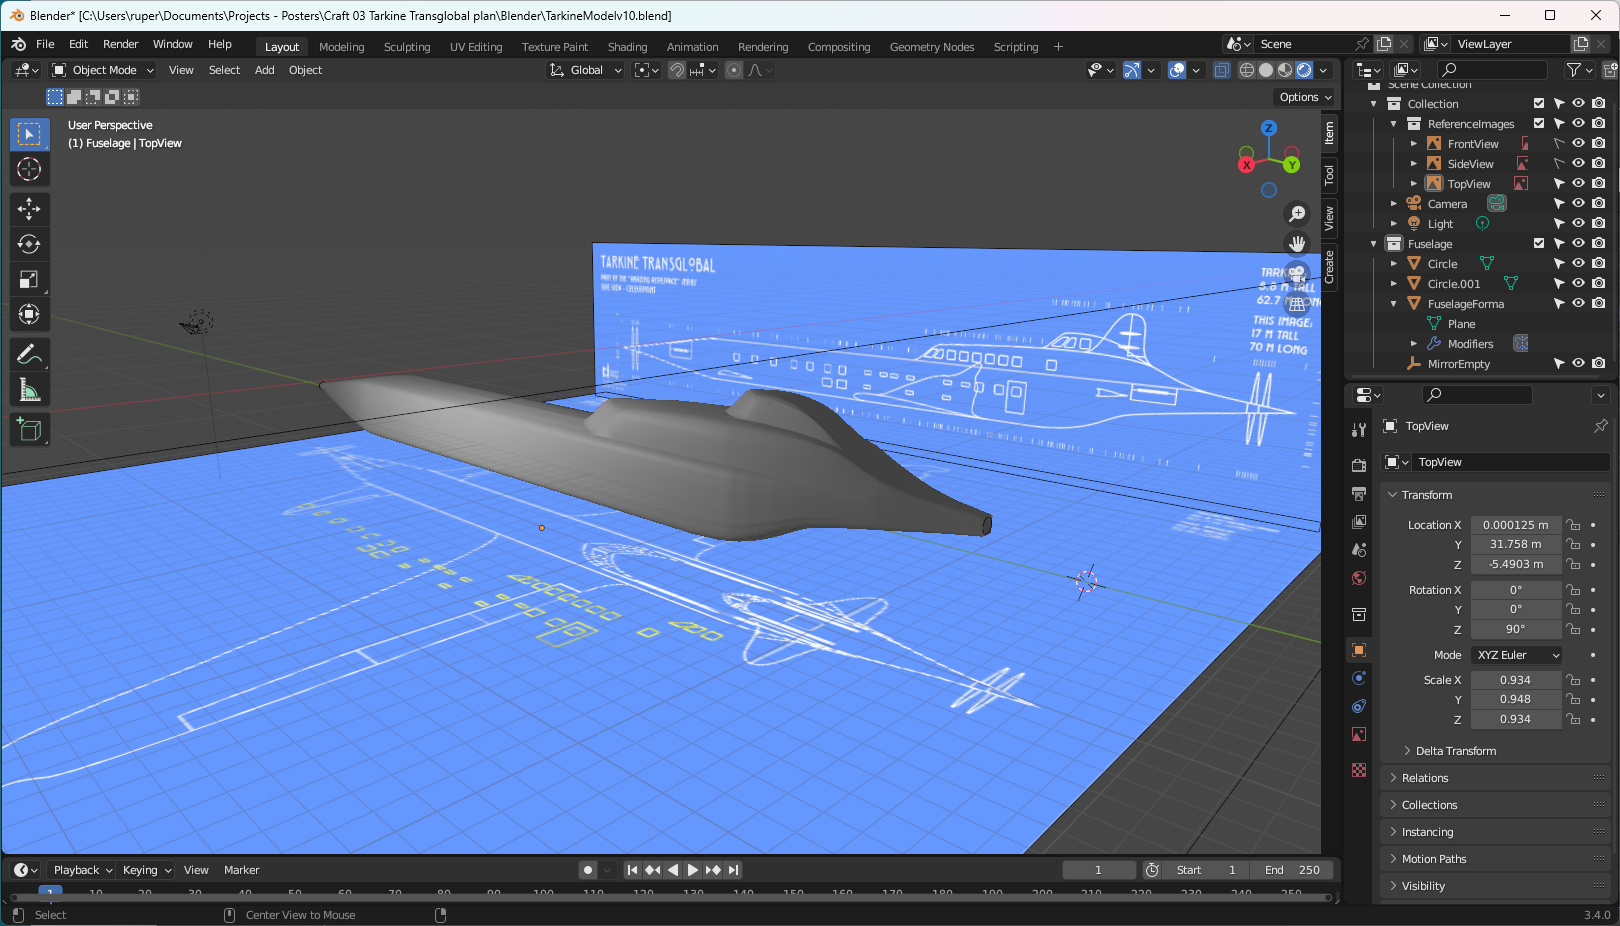
It has taken far longer than I expected, but Tarkine's modelling is pretty much done, and I'm quite pleased with the result. It fits with how I expected the aeroplane to look based on its plan drawings. I have created all the mirror modifiers - I'm just going to check what is there - then I'll apply them all and create the final shapes.
After that it is off to the paint shop for some textures, then a new poster set based on the exploits of the Tarkine Transglobal.
Cartoons
23 June 2023
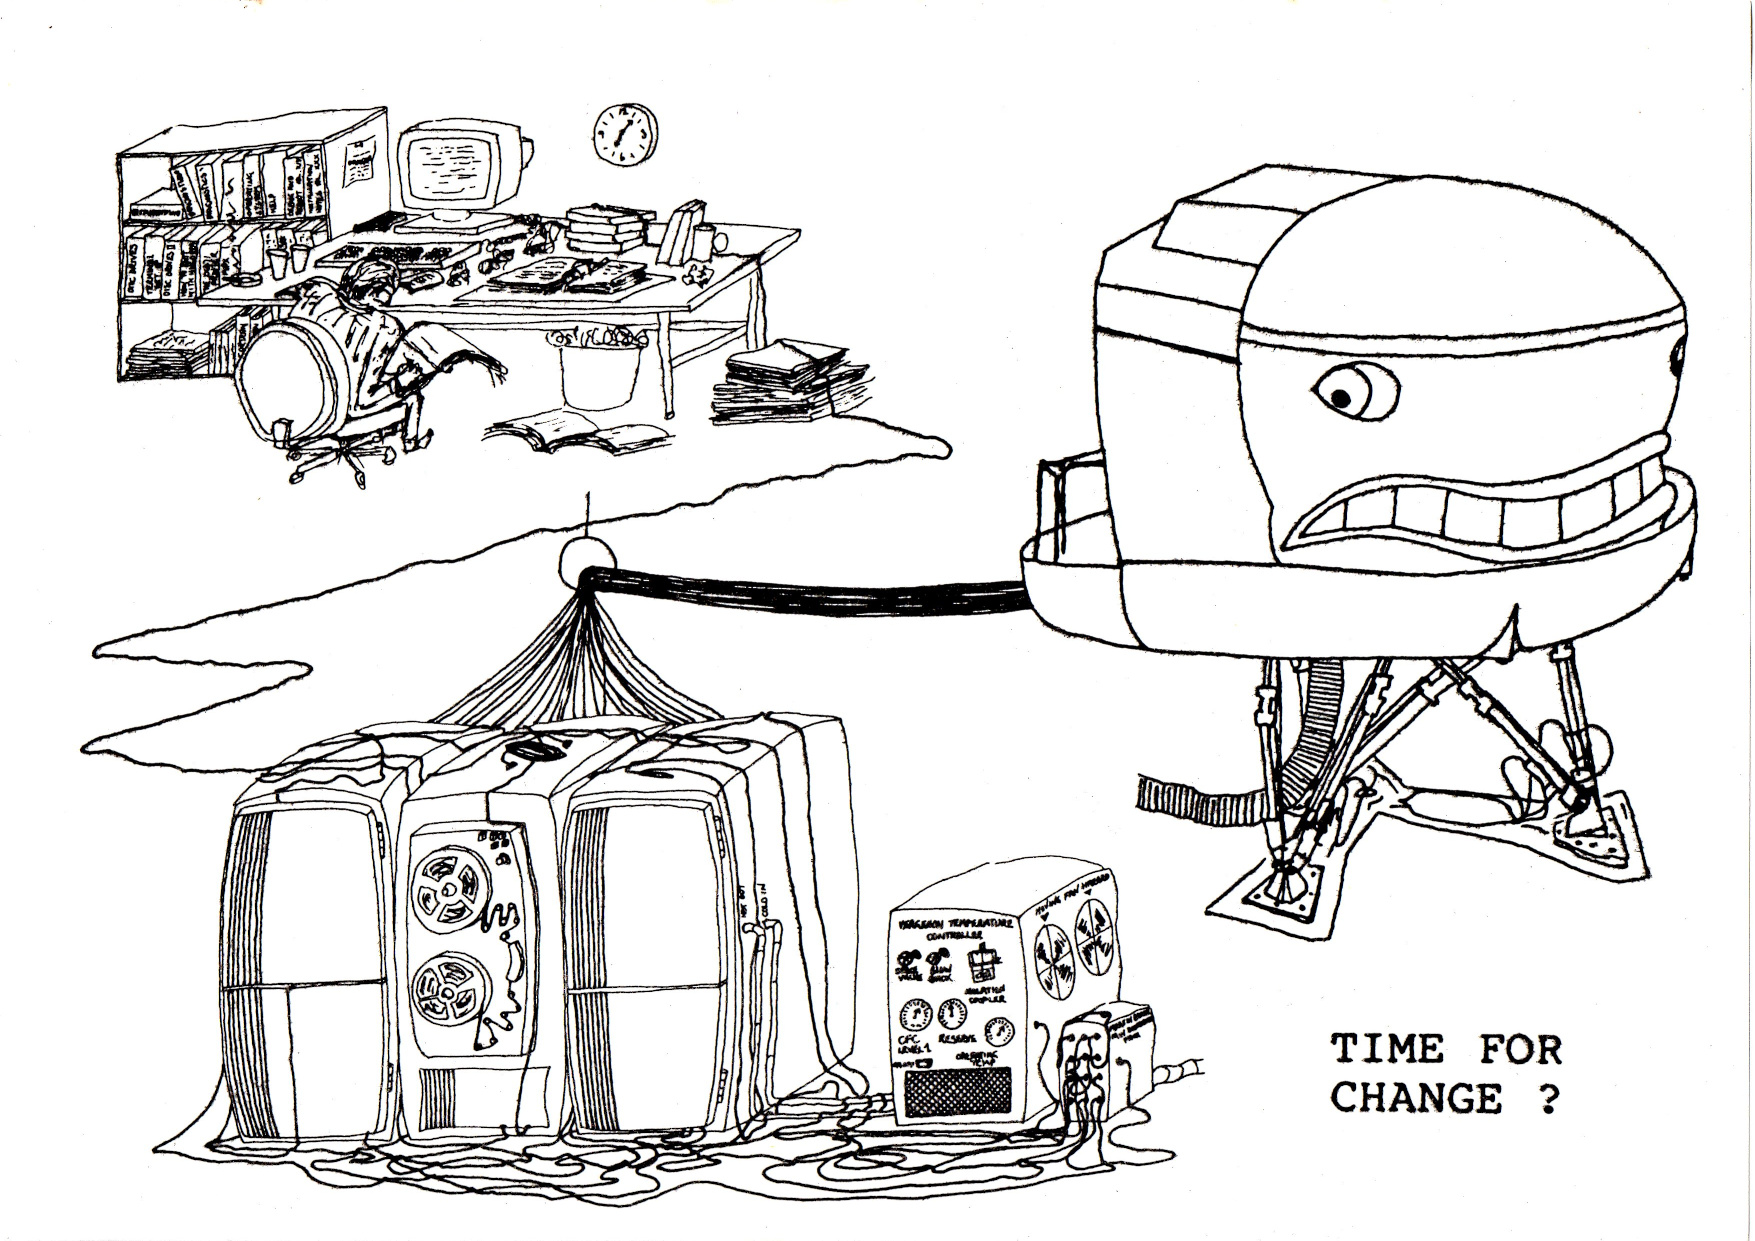
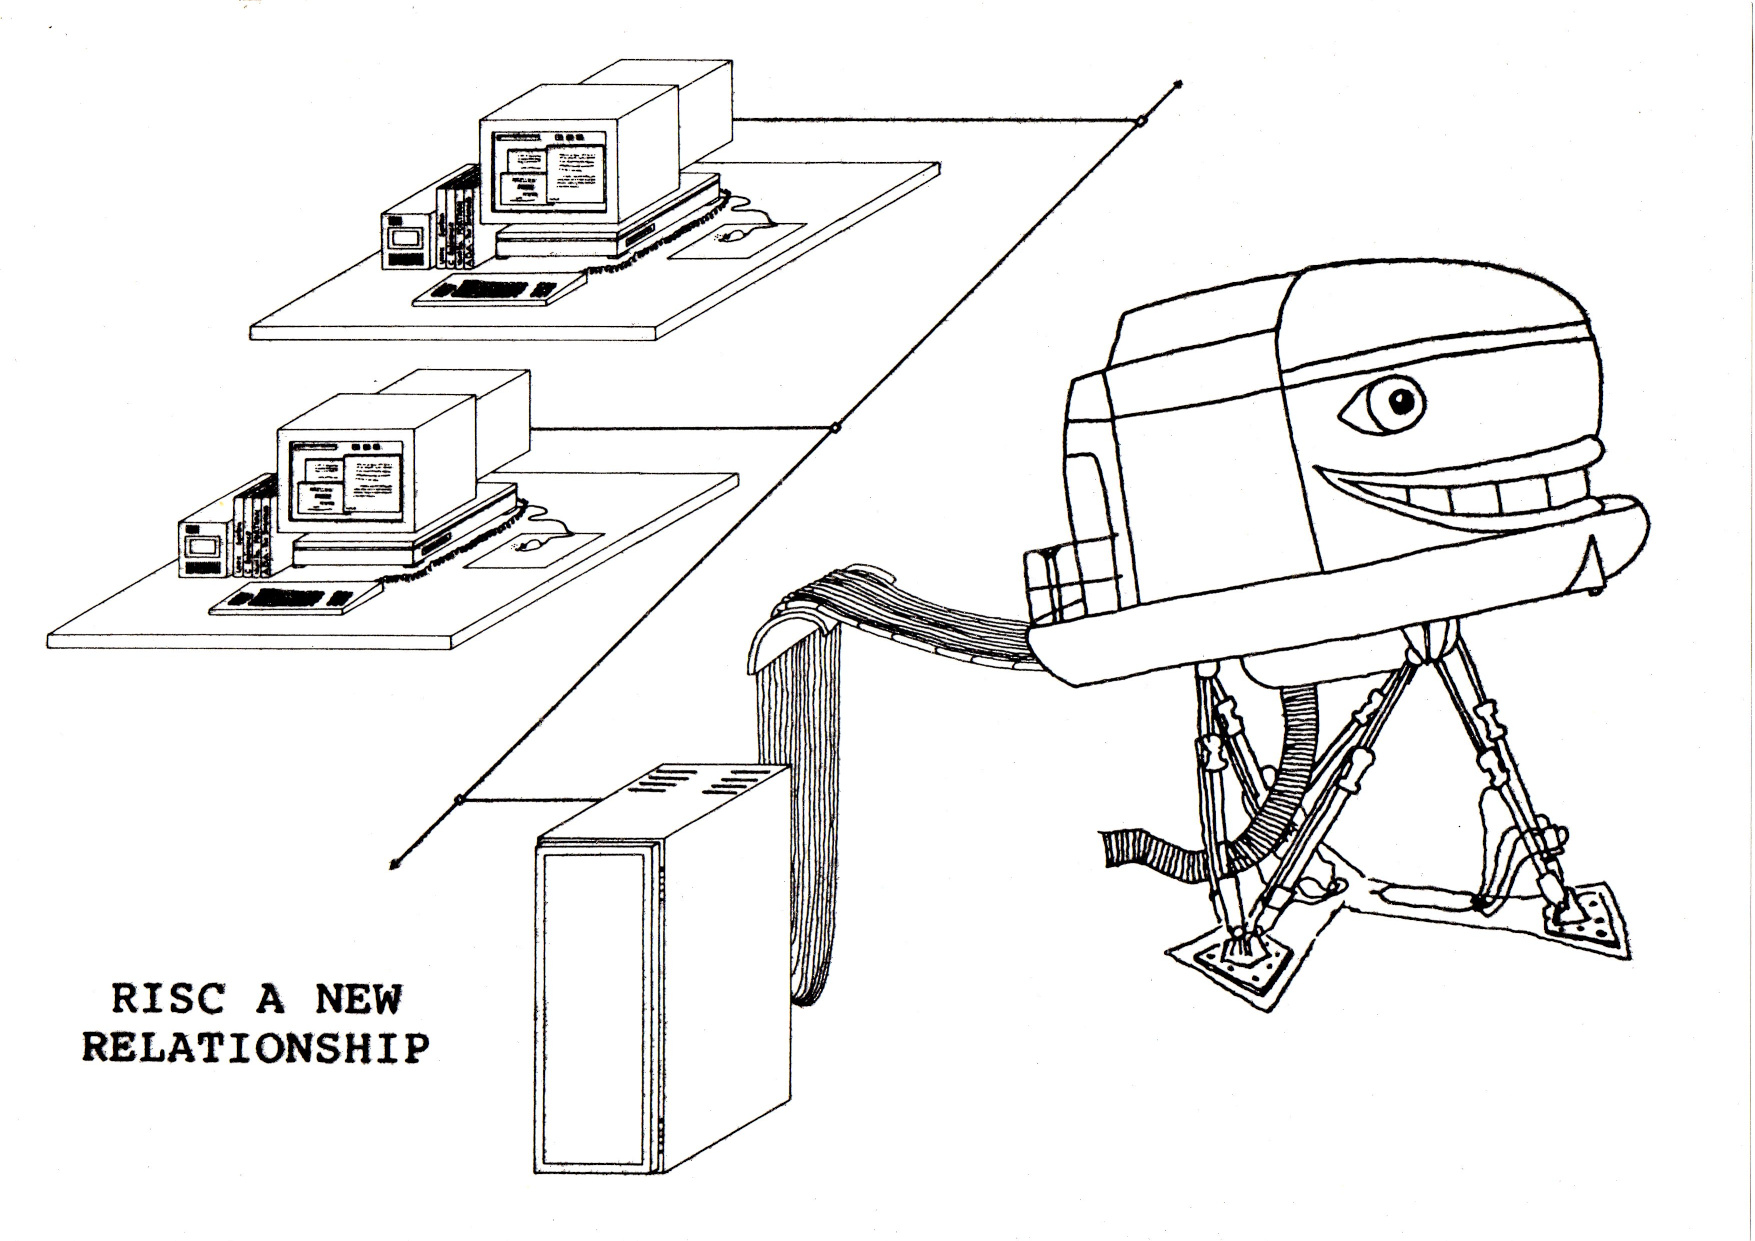
I was rummaging around in old files the other day and came across a couple of drawings I did years ago - early 1990s probably. I was working at a company that made full flight simulators. The simulation company was a very sophisticated user of computer technology. The simulations were a mixture of code and of functionality provided by custom built analog electronic interface boards. This was technology that had been developed and refined over many years.
The 1990s was a time of great disruption because of advances in chip technology. It felt like overnight the old simulation computers were rendered obsolete by new RISC based systems including things like Sun Sparcstations. The new computer technology was also significantly cheaper - a simulator computer system could cost in the millions. The new ones were a fraction of that.
I did these two cartoons at that time. They show the effect of that transition. It was troubling for a lot of the engineers. The world they knew and loved was radically changed. Now of course computers have so much power, you could probably run the code from a simulator of that time on a modern laptop. I was told that the flight program for the first 747 simulator took 64 KB of memory.
The computer companies from that time have pretty much disappeared - Concurrent, Gould, Encore, Harris.
Tarkine - ailerons
12 June 2023
Ailerons, and flying control surfaces in general, are quite tricky. They have to maintain the profile of the wing but be a discrete piece with a distinct line of separation from the wing. In of themselves they are quite easy to make. You model the whole wing, in Edit mode select the part that is going to become the control surface, and then do the Shift d | LMB click | p s thing. How do you get that gap?
Simply moving vertices in the global X, Y and Z axes is very tricky if you want to maintain that wing profile. I found I was messing things up very quickly. To create the gap, vertices have to be moved along the profile axis, and by a controlled amount. You could do a vertex slide but that has a problem. It won't tell you the absolute distance you have moved your vertex - only the percentage moved (to the next vertex).
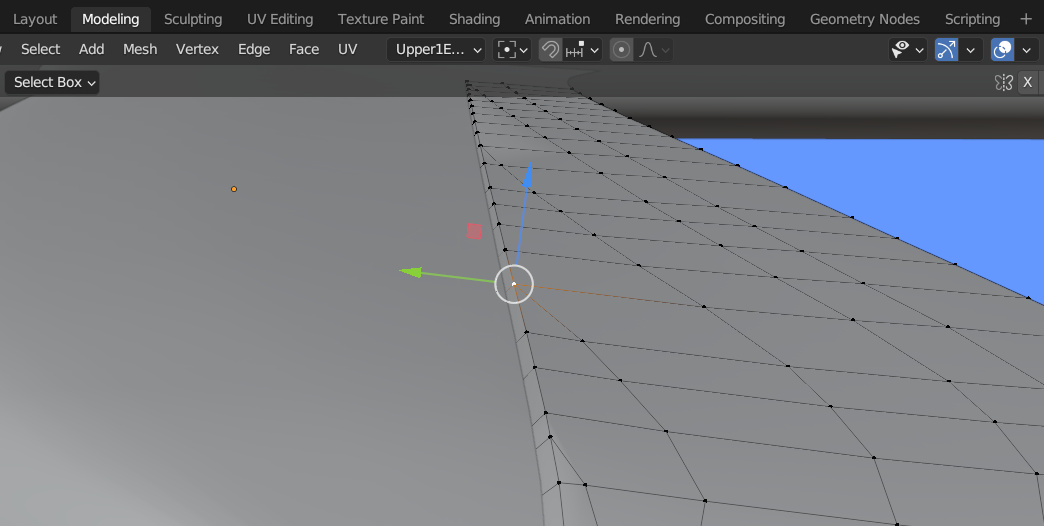
I worked out a very neat solution using custom orientations. Just like the Global - Local - Normal orientations, so you can create your own. Select the piece of geometry you want to orientate to - in my case it was edges on the control surface. Click on the orientations menu, click on the + sign, and give your new orientation a name.
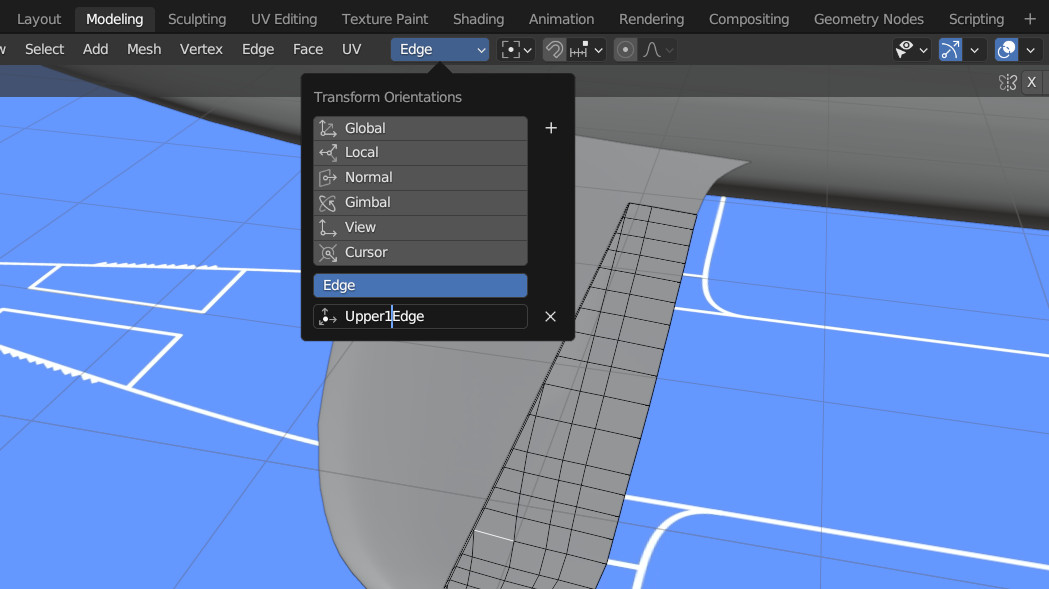
Select the vertex you want to move, press g then use the arrows to make the movement along a particular axis (in this case the green one). The precise extent of the movement you require can be typed into the transform dialog (bottom left on my interface). In this way I was able to create very precise gaps around the control surface whilst still maintaining the wing profile.
Tarkine - window geometry
27 May 2023
Well to be honest my cunning geometry plan for Tarkine was only partially successful. I had laid down geometry which I thought would support me easily building the windows and doors - but it didn't turn out quite that way.
The problem I faced was that I wanted all the windows and doors to be of a consistent form, even if they are different sizes and shapes. This led to a lot of head scratching about the way to create those shapes. In the end I decided to create the templates (as shapes) I wanted and then create the geometry using the boolean modifier. A great plan but - doing that creates geometry which could be described as messy or at least non-optimal.
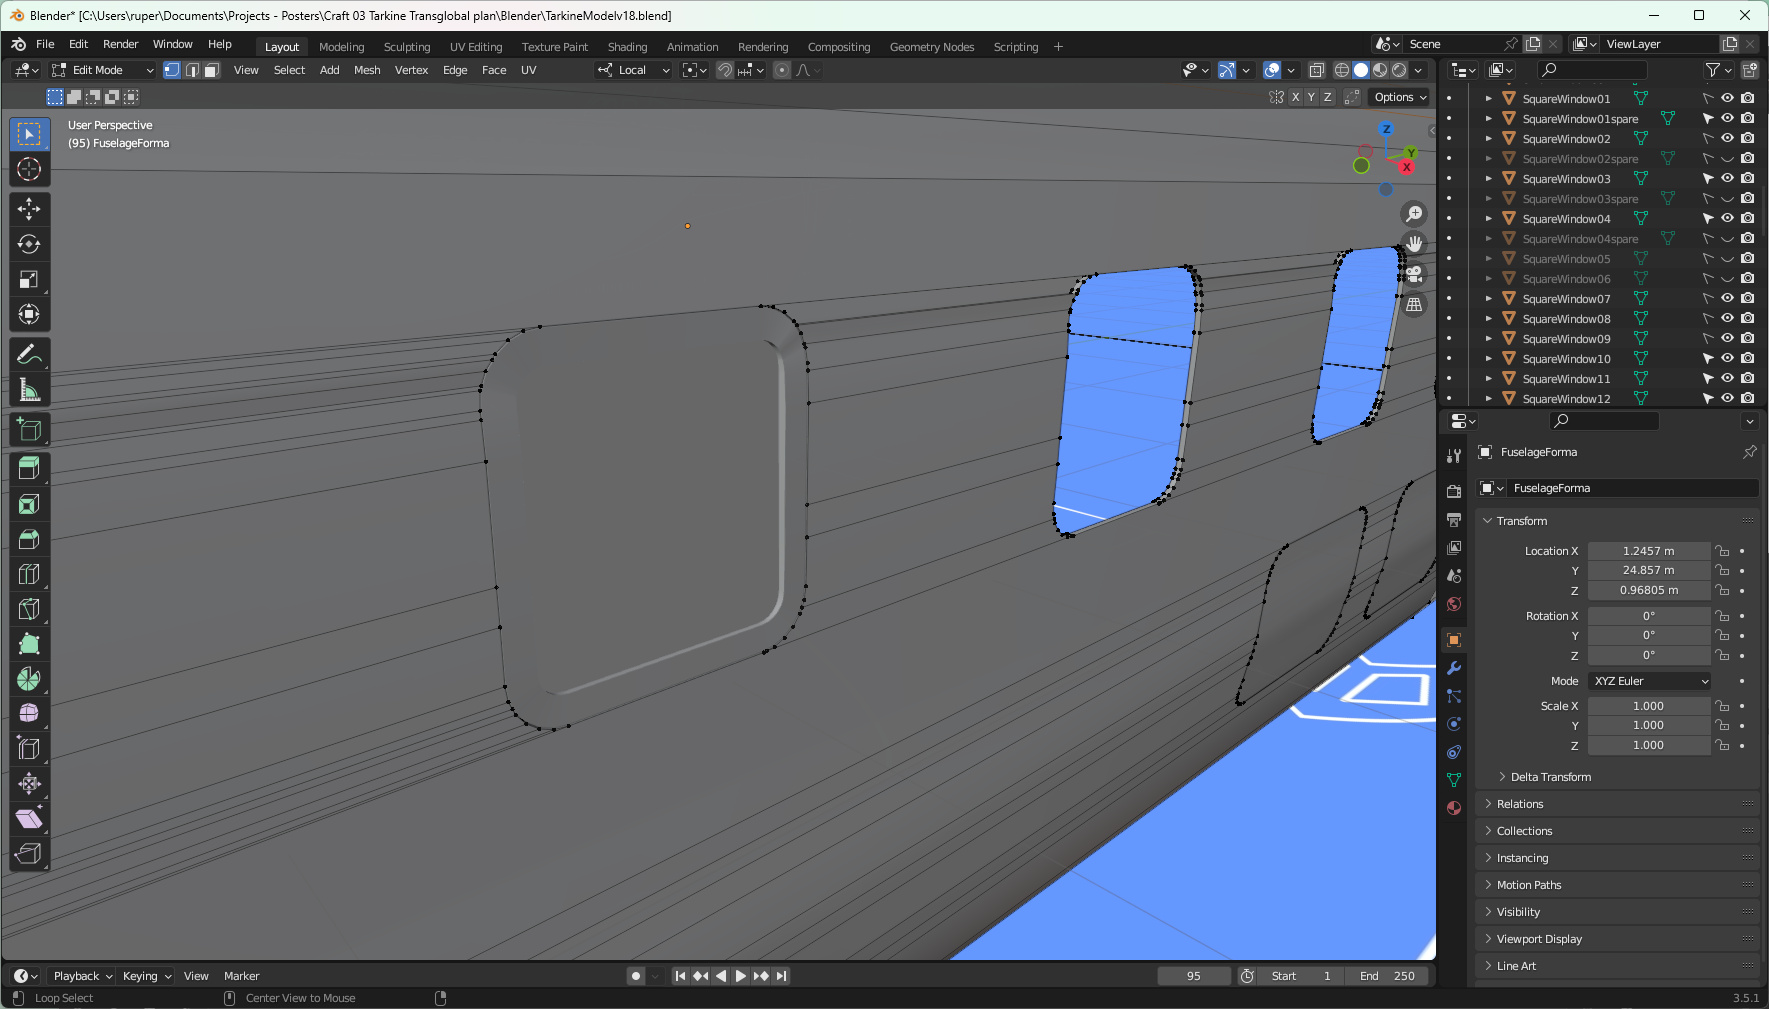
You can see here that creating the window opening has created more complex geometry around the opening. I've gone back in and manually fixed up things which I believe makes it better. But it is time consuming. I'll have to think again about that whole process.
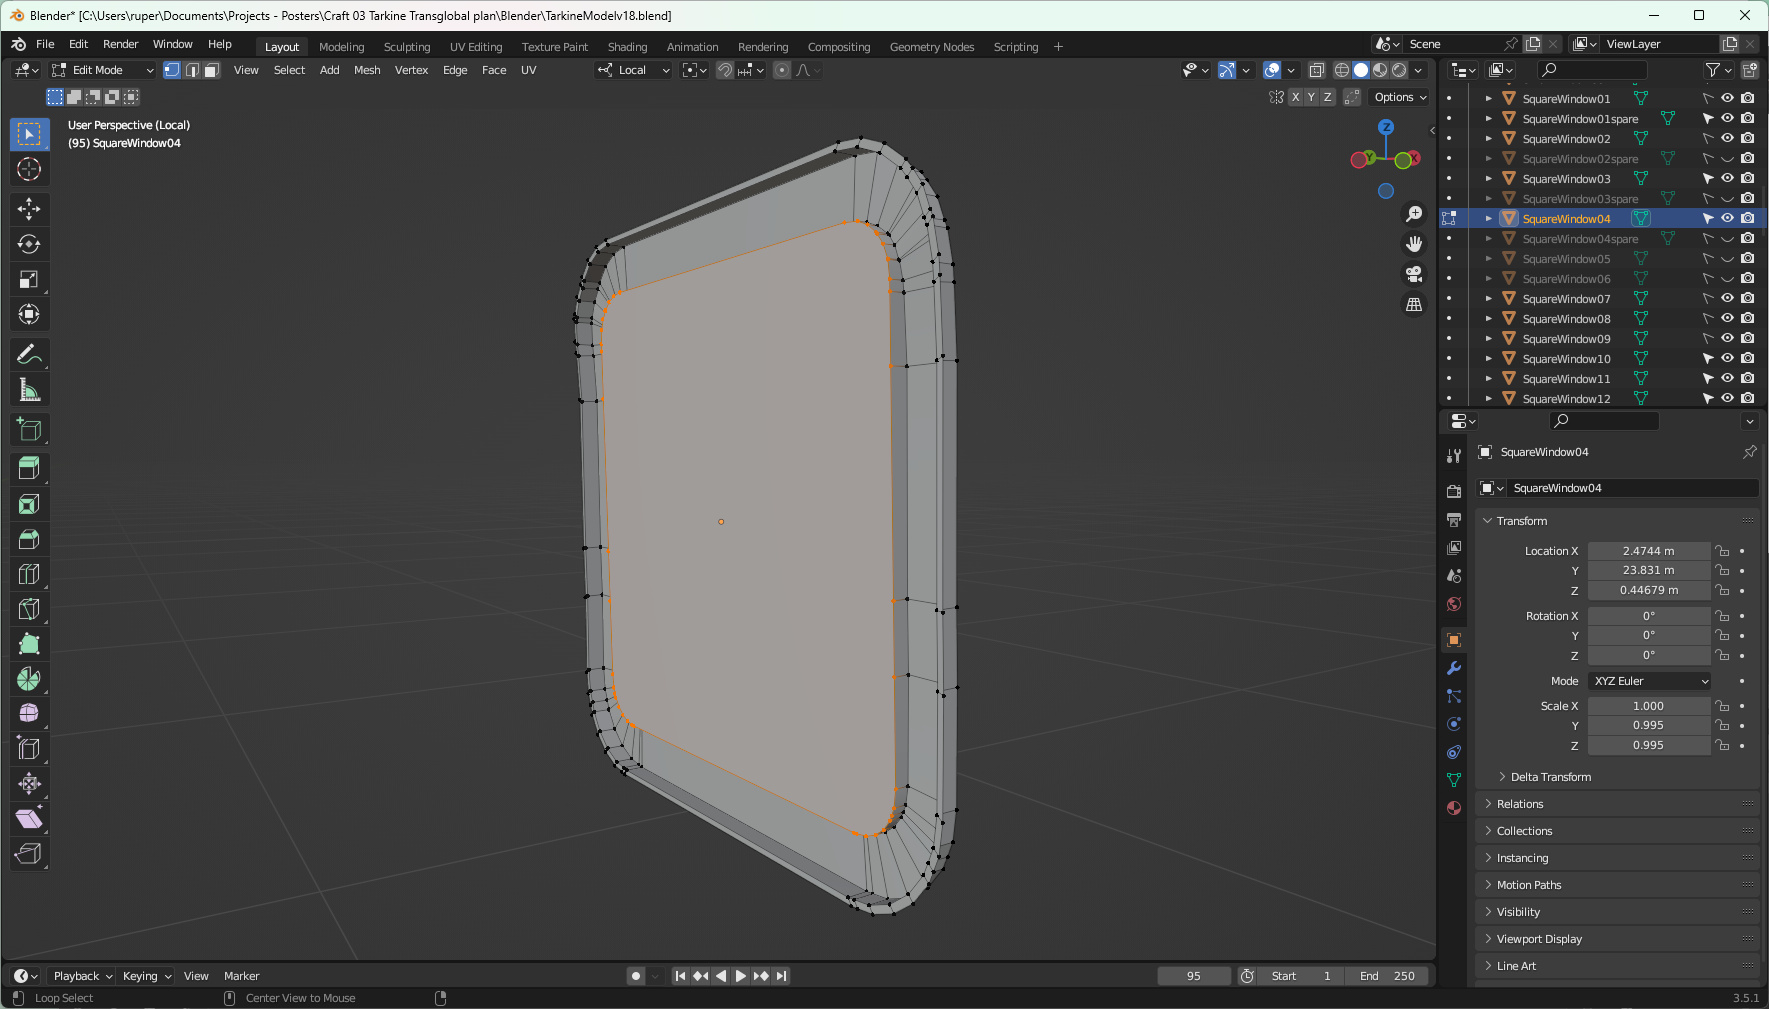
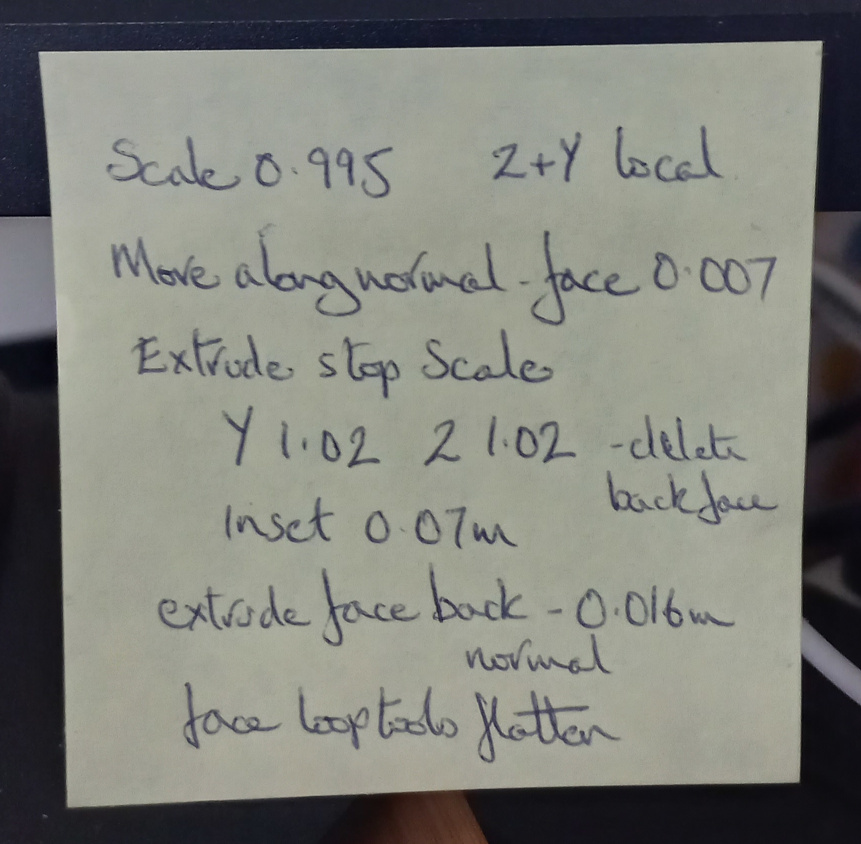
I'm actually quite pleased with the windows themselves. They took a bit of moving, scaling, deleting and extruding along normals and local axes, but the result gives me the geometry I wanted. That is driven by my plan for the application of textures.
Tarkine - on the shop floor of Cyber-Warton
29 April 2023
When modelling using Blender, I believe one of the most important things is working out how you will start your model. Blender is very powerful and will let you make any number of adjustments to the geometry of a model - but life becomes so much simpler if you get the form of the geometry fundamentally correct from the start.
I've completed Blender courses that tell you to start with a standard mesh that most closely resembles the final shape you want to achieve. I think that is good advice, especially if you are relatively new to the tool and still finding your way. With experience you can start in a more design-driven way. The fuselage itself is a squared off tube, but that in turn is complicated by the need to create windows and the wings of course. I developed the fuselage cross-section by extruding a single vertex from a plane following the blueprint, and then deleting the plane.
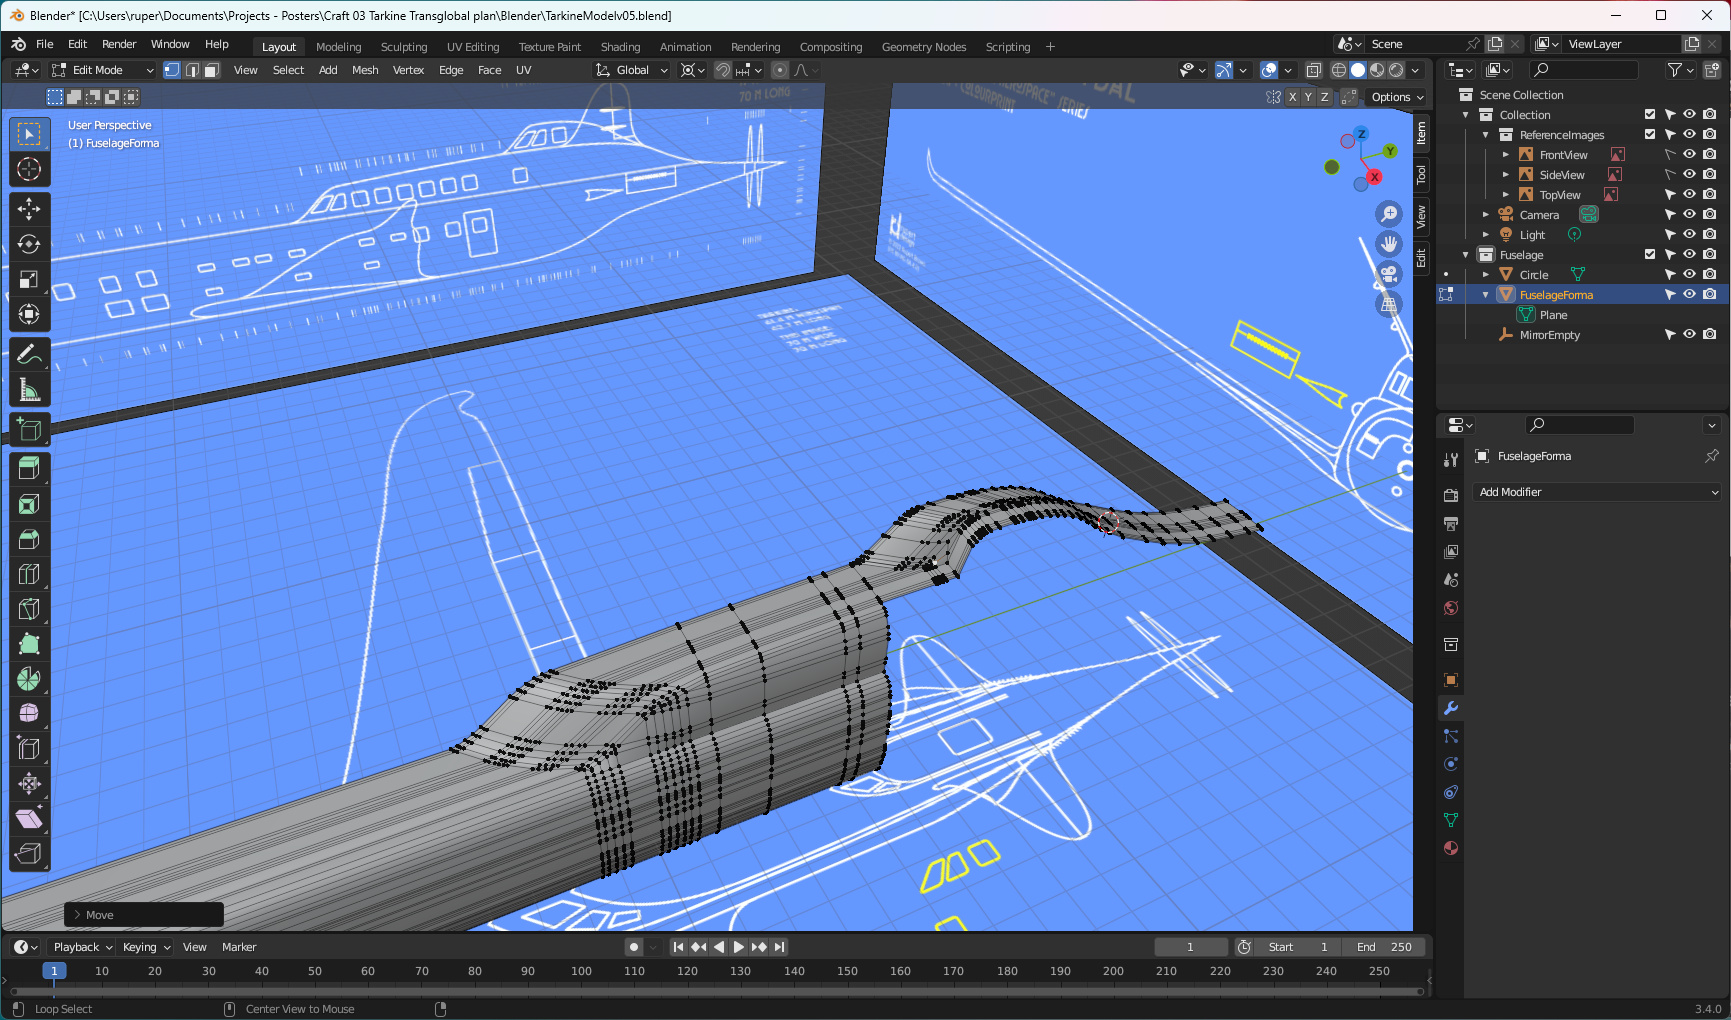
I knew that Tarkine was going to be quite a complicated model. You just have to look at the configuration of the rear of the fuselage to see that. That shape which ends up as a fusion of the fuselage and Sky Lounge and Pilots' cupolas is quite unusual.

So before you start modelling, I think it is important to ask yourself two questions:
- For this model, how should I create the mesh? Is the model going to be one large mesh, or is it better to divide things up and create model parts from several meshes?
- For each mesh, how do I create the geometry to support the features of that part of the model?
In the case of Tarkine I've taken the decision (right or wrong) to create the following parts list:
- Fuselage,
- Main wings,
- Canards,
- Tail fins,
- Propellors,
- Engine exhausts.
In terms of the fuselage mesh, I've included geometry I hope to be able to use to create windows. I'm quite pleased with the way it is developing, and how my blueprints are working out. Long way to go but a good start.
A second SkyLuxe poster
19 April 2023
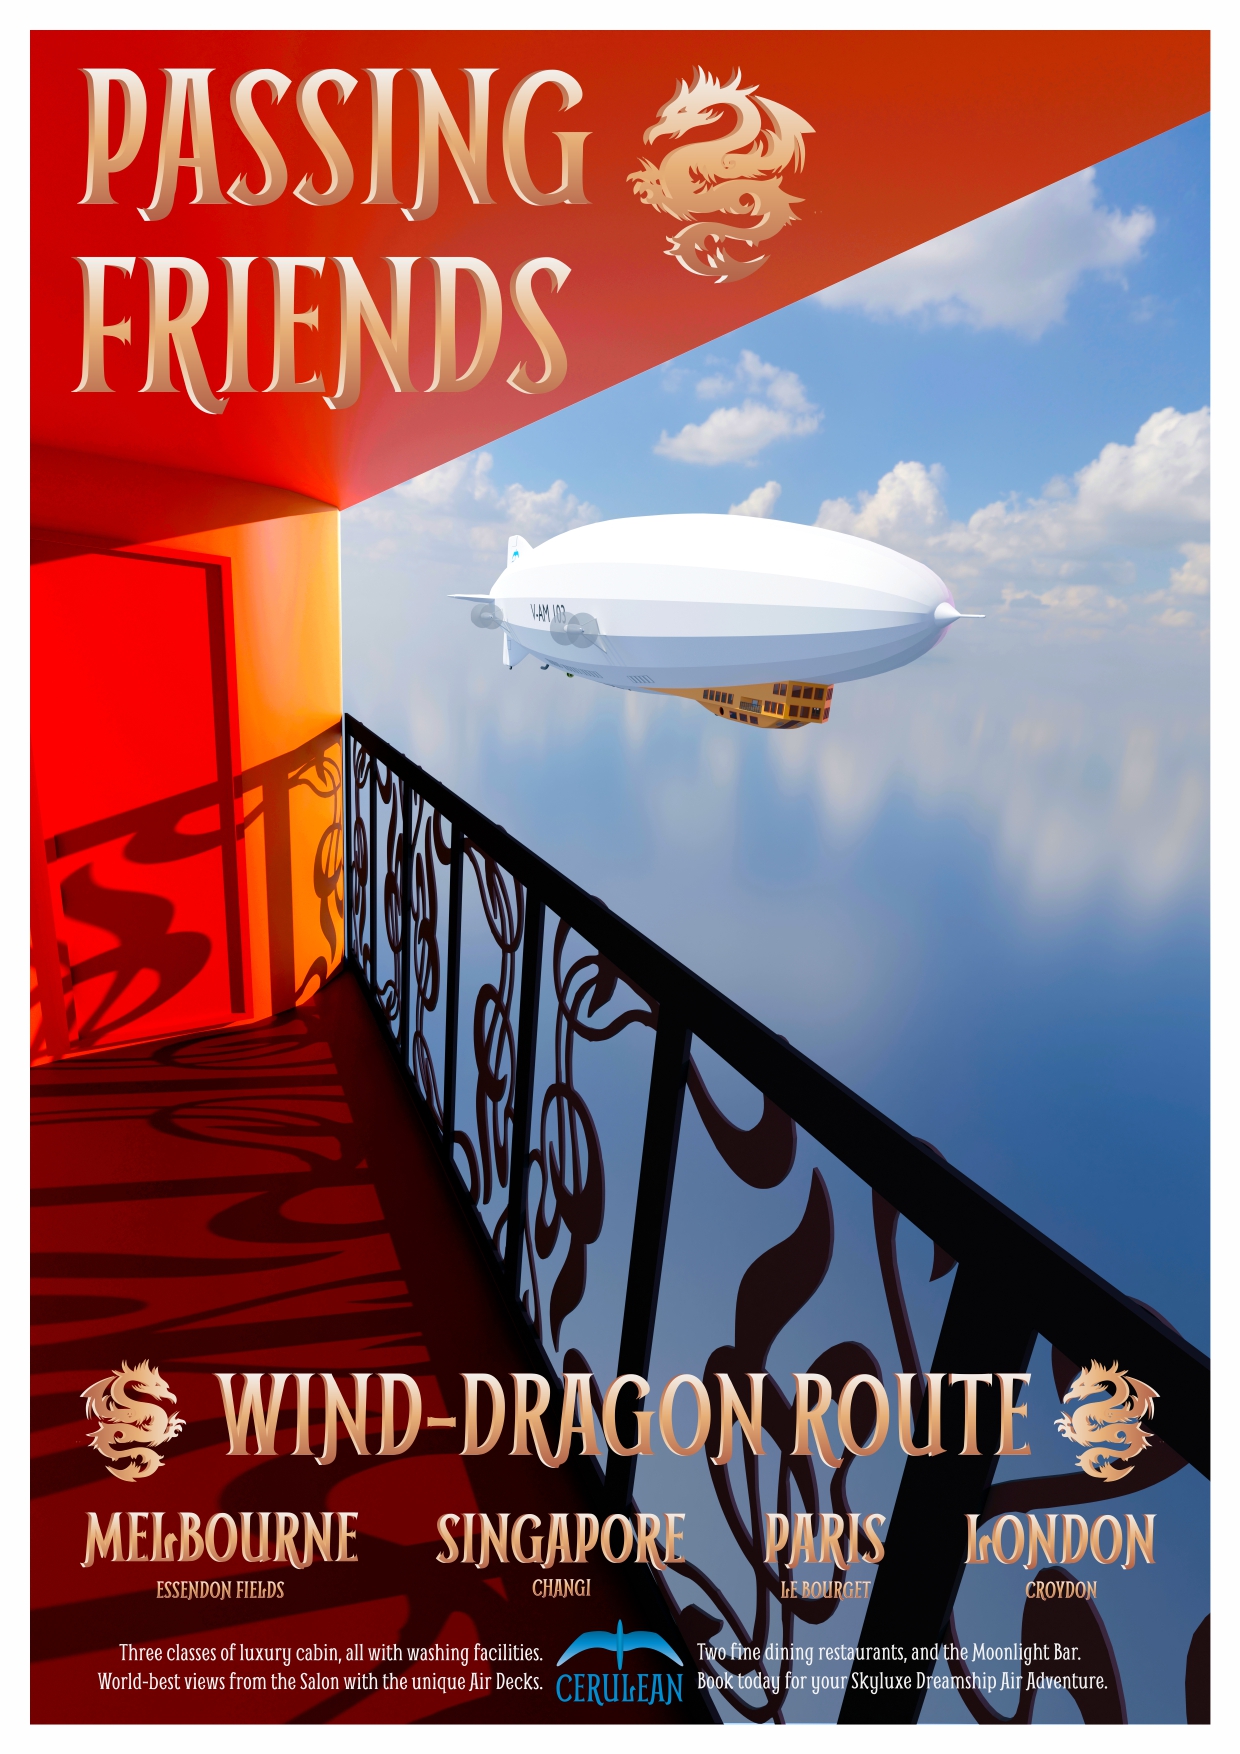
I had this idea for a poster showing SkyLuxe docking with the top of the Eiffel Tower. Even though airships have flown around the tower, and even bumped into it, I don't think any have ever moored there - for good reason - it was never designed for that and it wasn't something I considered when drawing up SkyLuxe. A new concept came to me from the phrase "ships that pass in the night". I wanted airships rather than ships, and the whole thing to take place during the day so I could make something of it. To view one airship from the other - and the Air Deck provided the perfect viewing platform.
Now I have the SkyLuxe model it was a fairly simple process to duplicate it and position them as if they were passing each in flight - I imagined over Singapore for some reason.
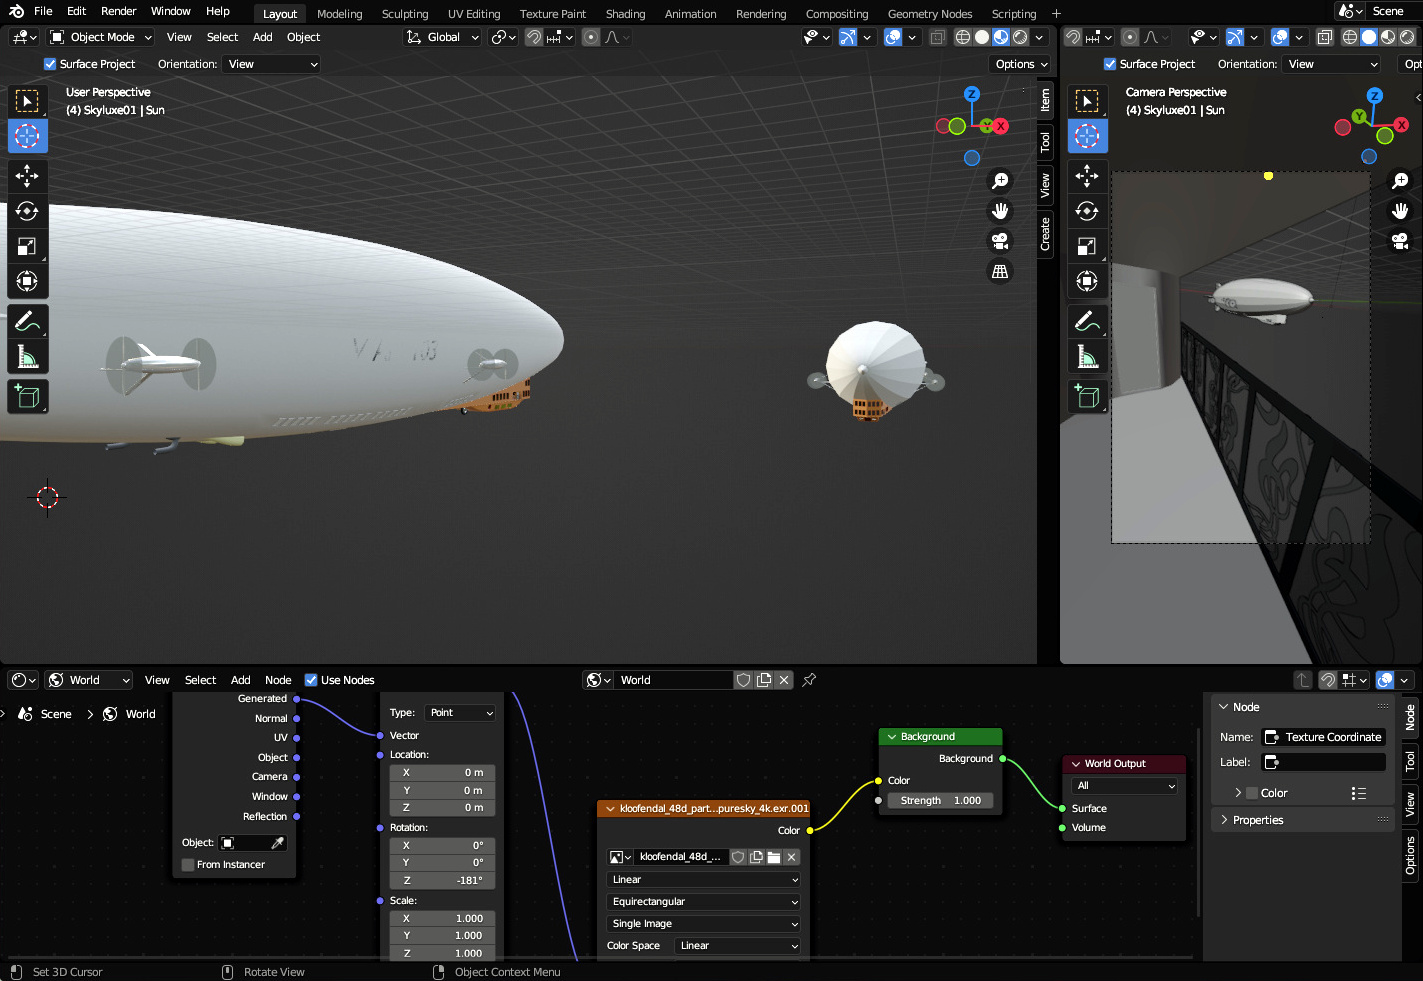
Then it was a matter of placing a camera on the Air Deck of one airship and jiggling around with positions, cameras and the HDRI background to get everything looking right. There are a huge number of things you can adjust.
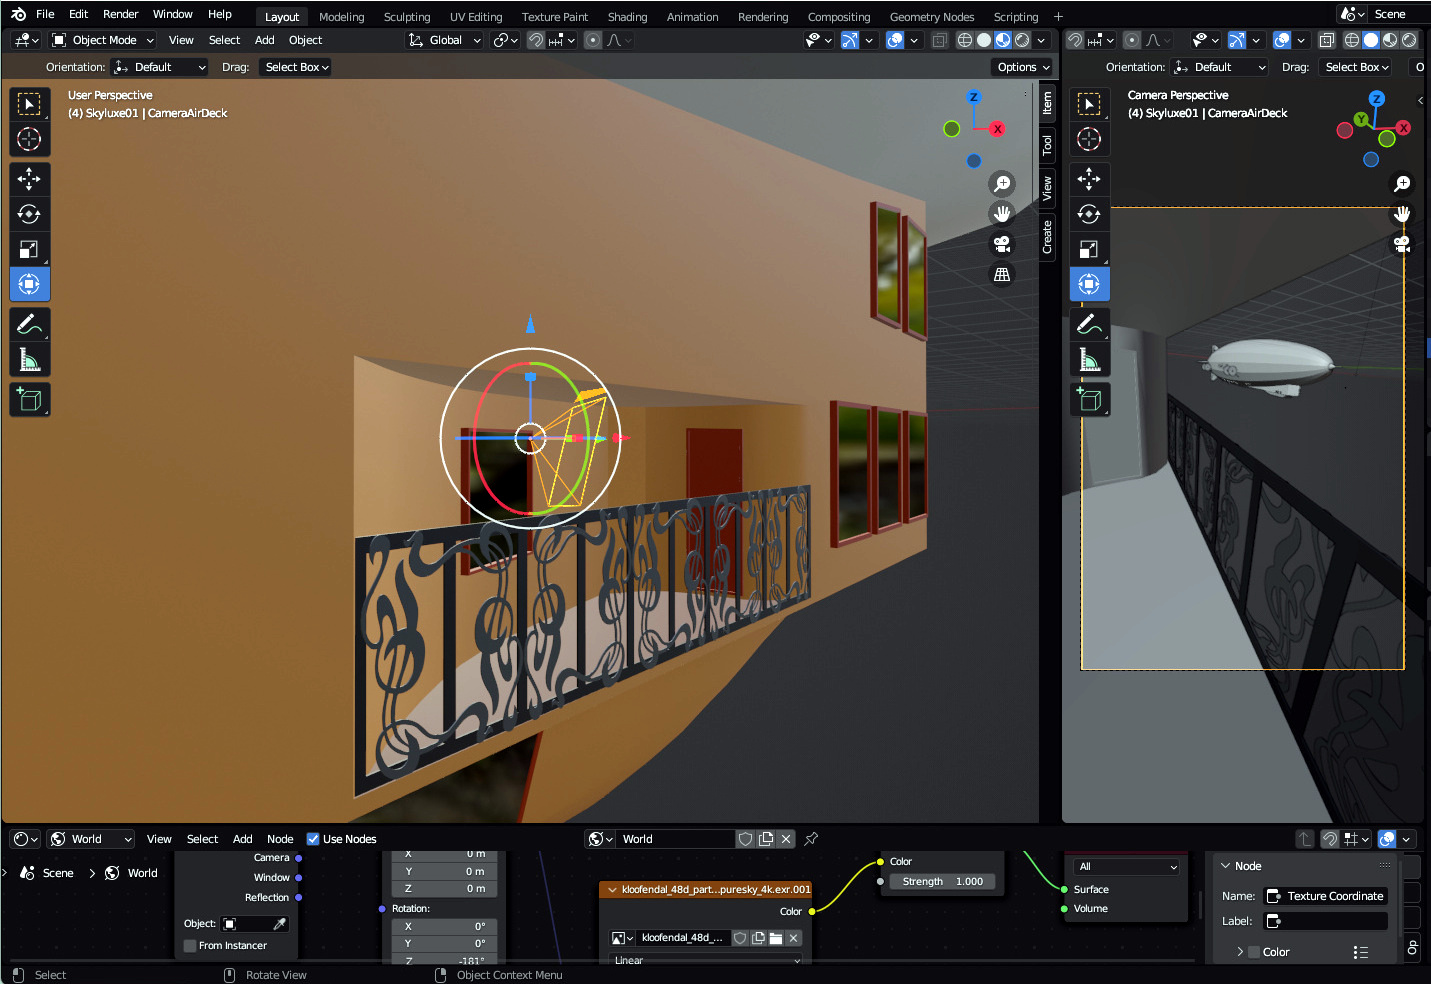
I did several test renders which all looked very promising so set it up for the big 4,724 by 6,780 pixel render which is what I needed for my 300 dpi A2 poster. The render took a little over two hours. Now I know that for print, colours have to be brightened and saturated a little to look good. I did that, applied the text, and was pleased with the result which went off to Officeworks.
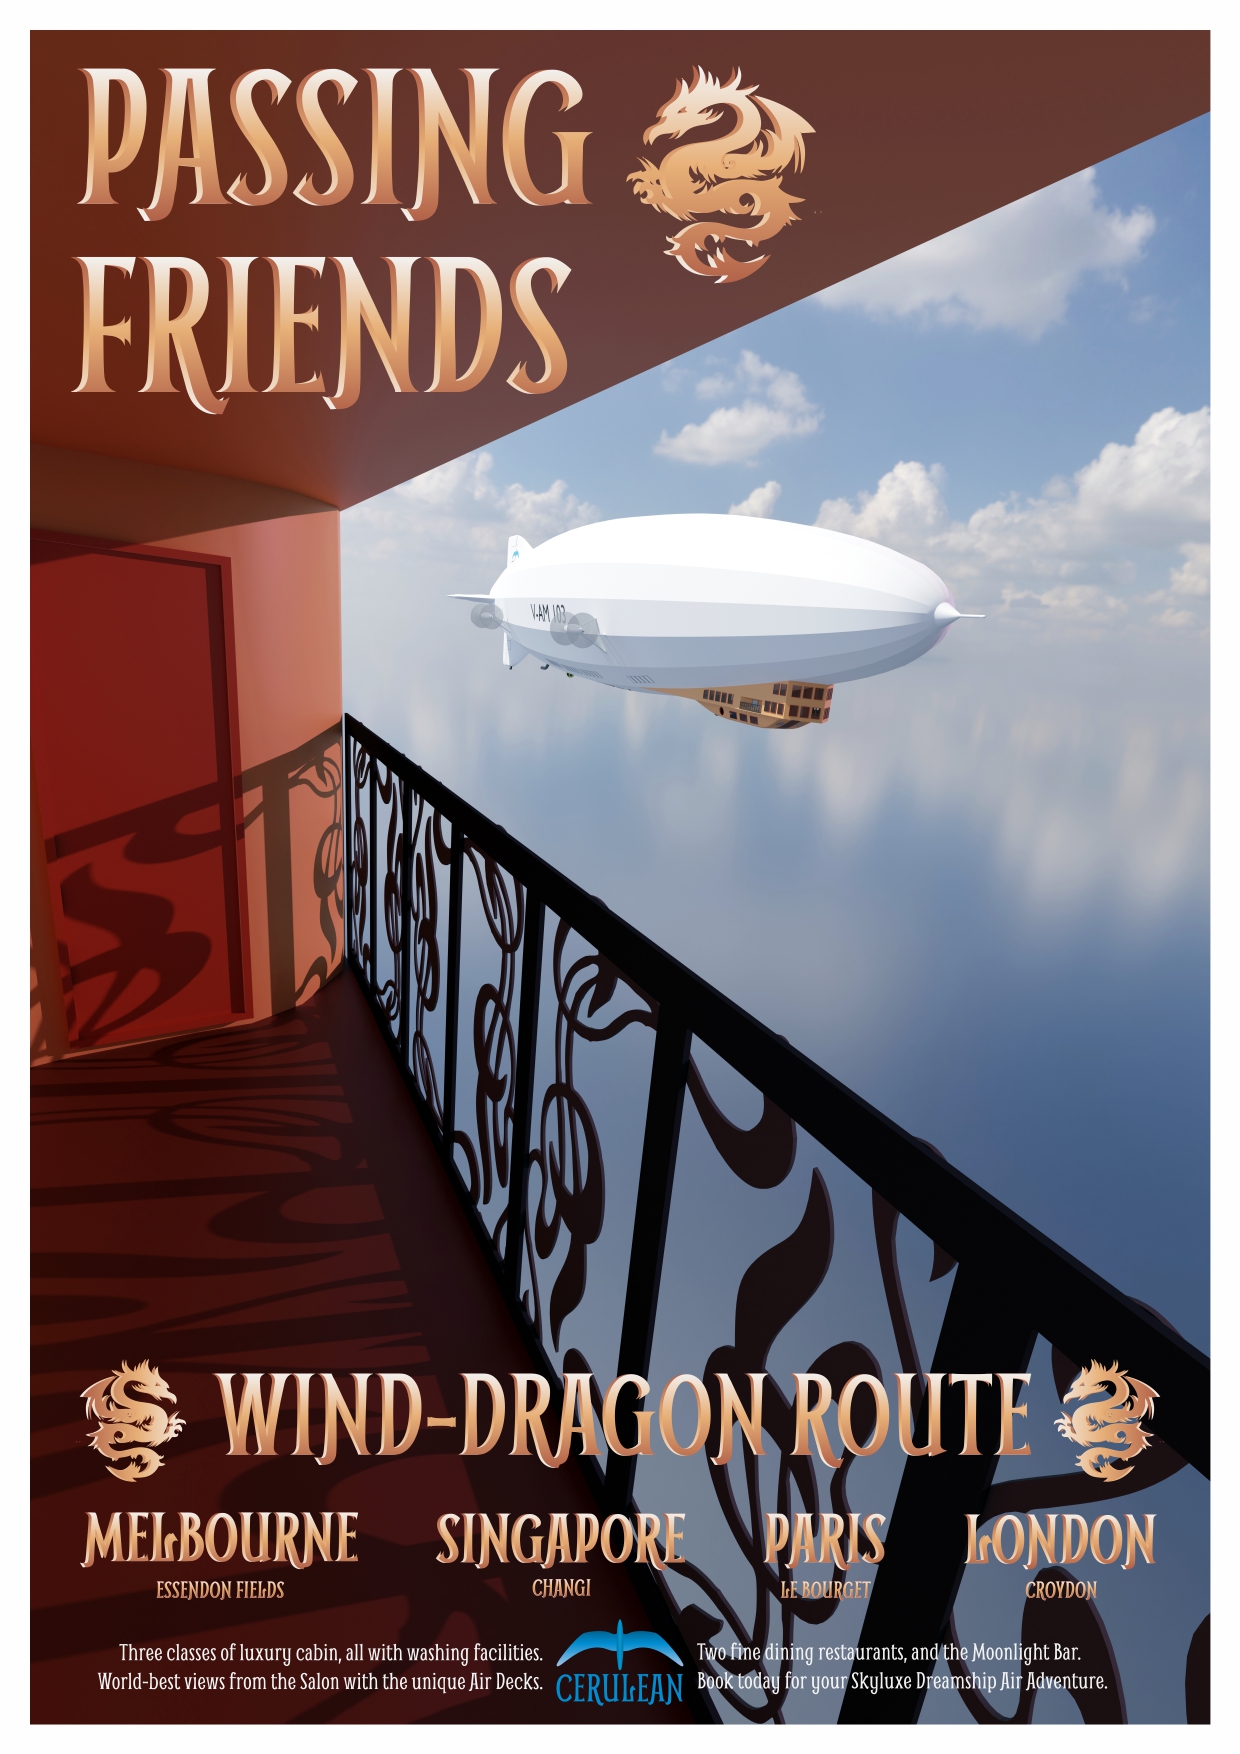
No - that didn't work out at all. The print was far too dark and the shadows were lost in one big black area. So back to GIMP and some serious tweaking to lighten the Air Deck and not wash out the airship image. Eventually I achieved a decent print - and I like the red tones.
Cellar Door
12 April 2023
If you live in and around Melbourne (Australia), I hope you get a chance to travel down to the Mornington Peninsula and have a long lunch at one of the many cellar doors. The variety is huge - from old sheds to world-class fine dining establishments. Recently President Obama was down visiting and enjoying fine food, wine and a sculpture park at one of the larger establishments. For a full list consult the map.
A cellar door is a complex operation. Typically it includes:
- All the viticulture that goes into looking after a vineyard,
- The combination of art and science that is wine making,
- The design and presentation of a wine,
- The design of a menu,
- The management of staff, suppliers and a kitchen,
- The management of customers, social media and sales,
- Running the whole thing as a profitable business, and
I could go on but I am sure you understand that it is quite an undertaking. I went back to ink and pencil for another rich picture, this time of a cellar door. The result is below.
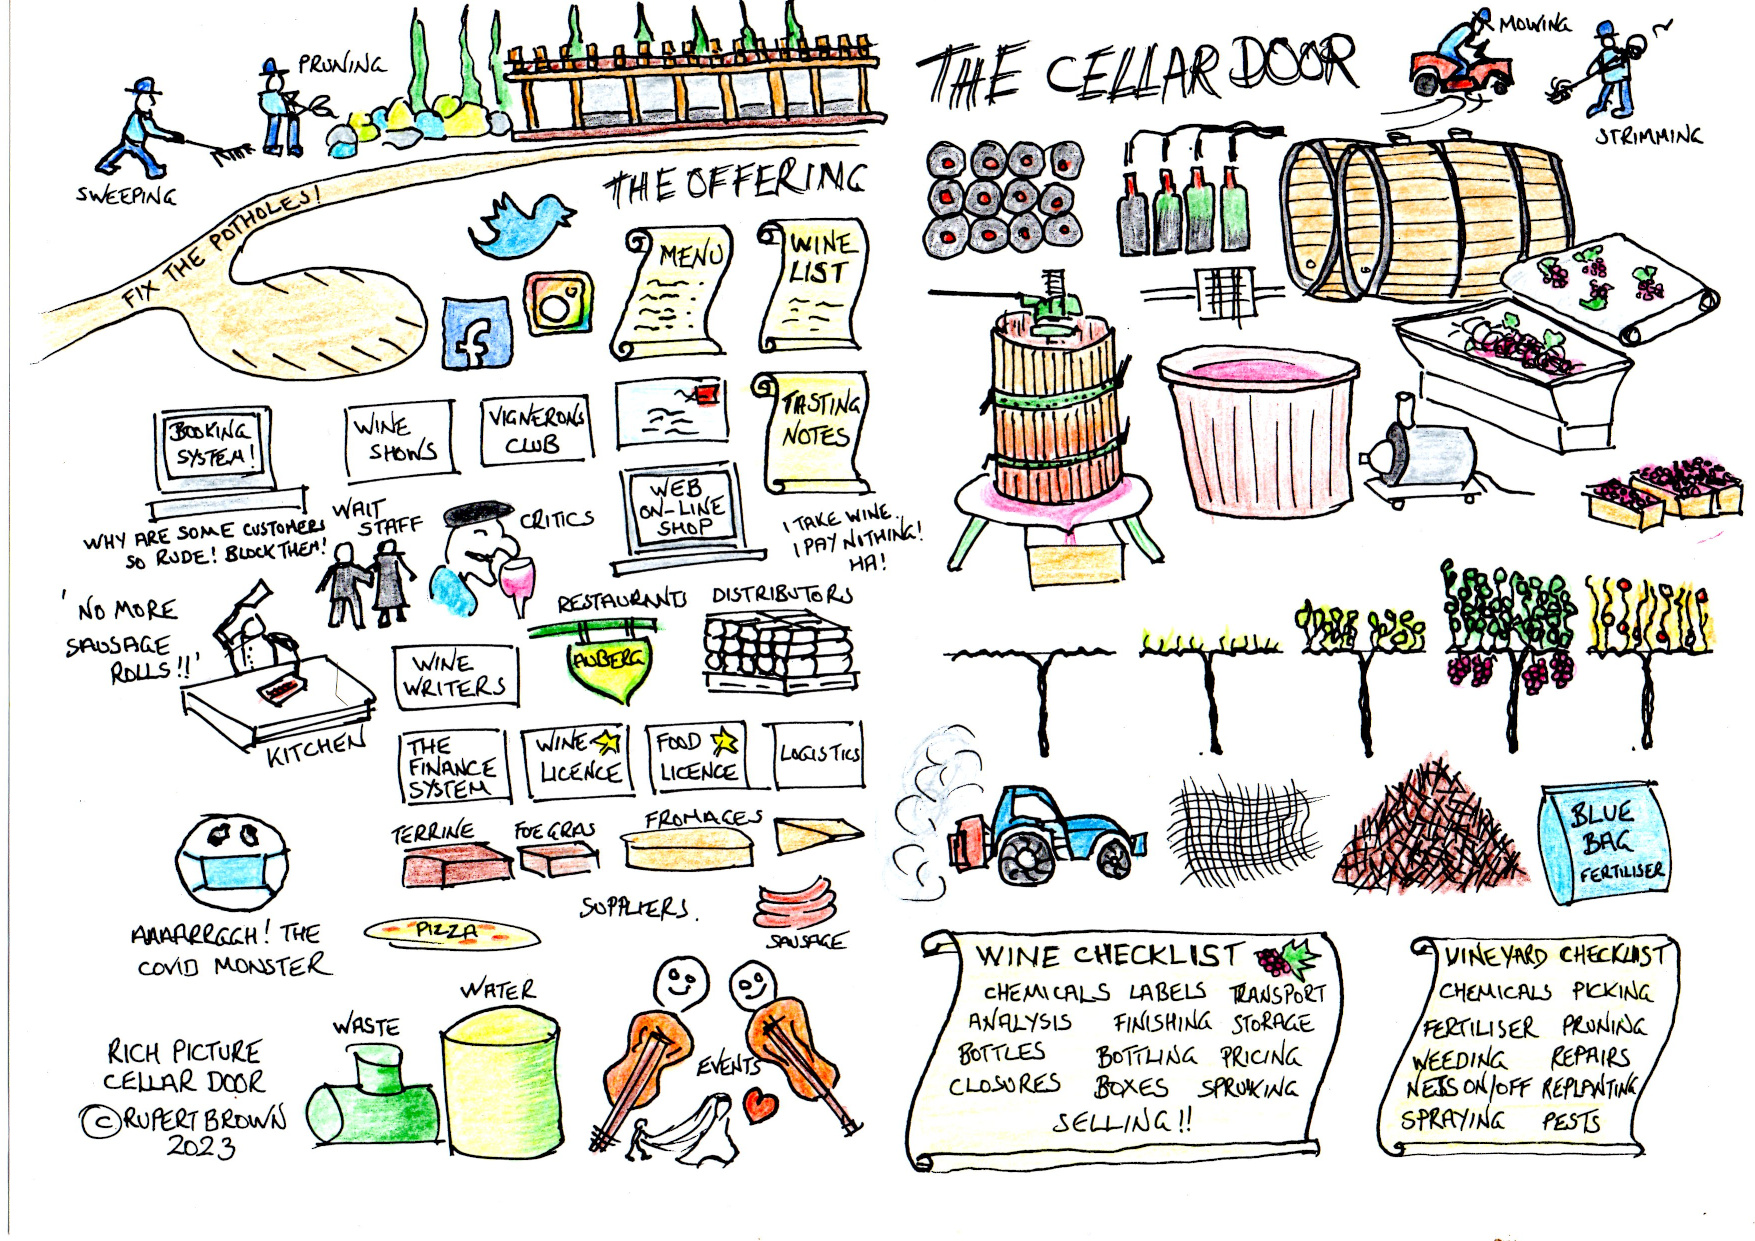
Every cellar door will have unique qualities but I think I have captured the main elements of the business.
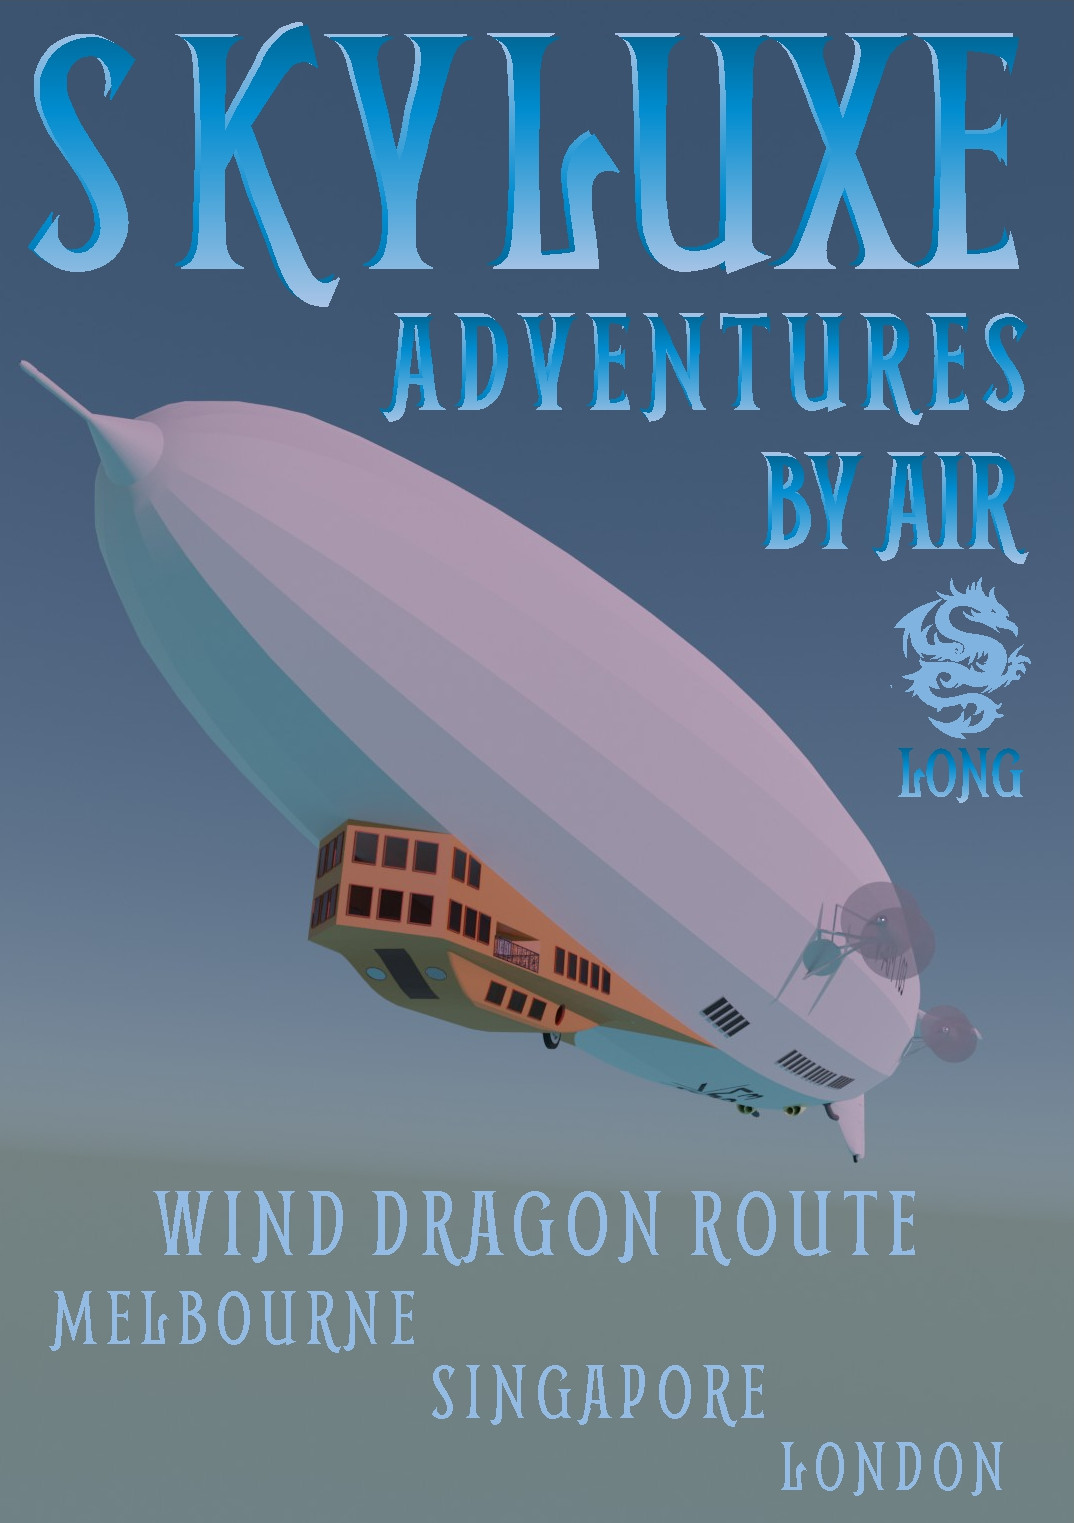
Skyluxe posters
8 March 2023
Creating a rendered image is one thing - knowing it is good enough for print is something else. Experience tells me that colours that look right when printed need to look a little saturated and brighter on your screen - and that is true whatever colour model you are using. So my Skyluxe rendered image is all very lovely but lacks the saturation and contrast for print.
I could go back and re-render in Blender using different lighting - in the end it was easier to use GIMP to tweak the colours. That done, it was time for my poster text and this is where I came up against an issue. The original posters used a font with a blue fill so that is where I went first, but against that sky image? No, it wasn't quite right. Looking at it again, the orange colour of the gondola looked like a good candidate, so I tried that.
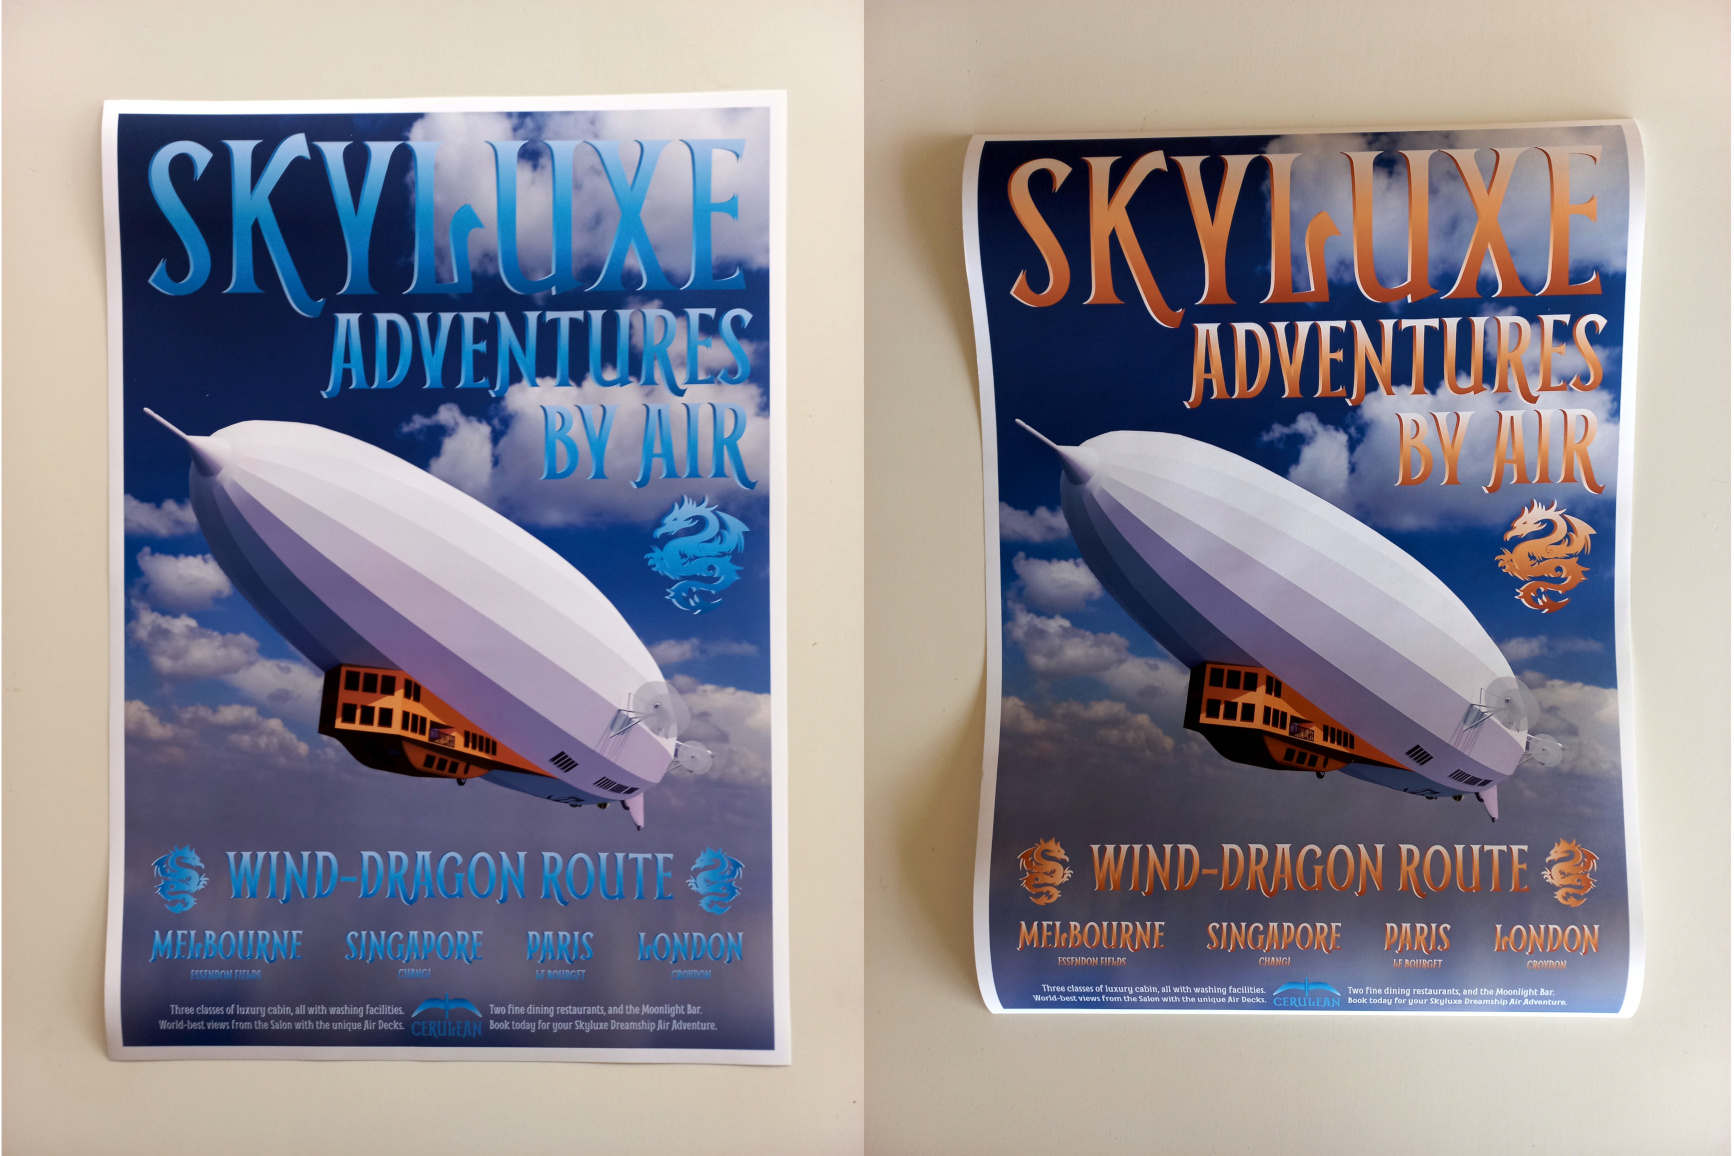
I think both have merit but in terms of impact the orange has it. I'll see how I feel about it after I have lived with it for a couple of months.
Skyluxe HDRI
24 February 2023
I wanted to do more with my Skyluxe model so I found a great HDRI image on Poly Haven and had a go at doing a more refined render.
HDRI is short for High Dynamic Range Image. Digital cameras only have a limited dynamic range — that’s why some areas of a photo appear darker than they do in real life. HDRIs give photo editors a chance to brighten the corners and create an image that looks more natural. The HDRIs used with Blender are typically 360 degree images. They render as a great background and provide the lighting for the scene. HDRIs are also very big files. That is my understanding at the moment - I'm on a journey here.
I wanted an image that was big enough to print as an A2 poster. Using 300 dots per inch (dpi) as the standard means coming up with an image that is 4,724 by 6,780 pixels. I set that up and let it go. The processor was working so hard on my laptop that I think it overwhelmed the power supply on my docking station and the second monitor shut down. The render took three hours. Anyway, I think I got a good result. Now I can work on the text.
Tarkine rising
15 February 2023
I know that there are two more rich pictures I need to draw - and will do when inspiration strikes. But in the meantime I feel it's necessary to return to Blender and the next Amazing Aerospace model: Tarkine Transglobal. The first thing - setting up my reference blueprints.
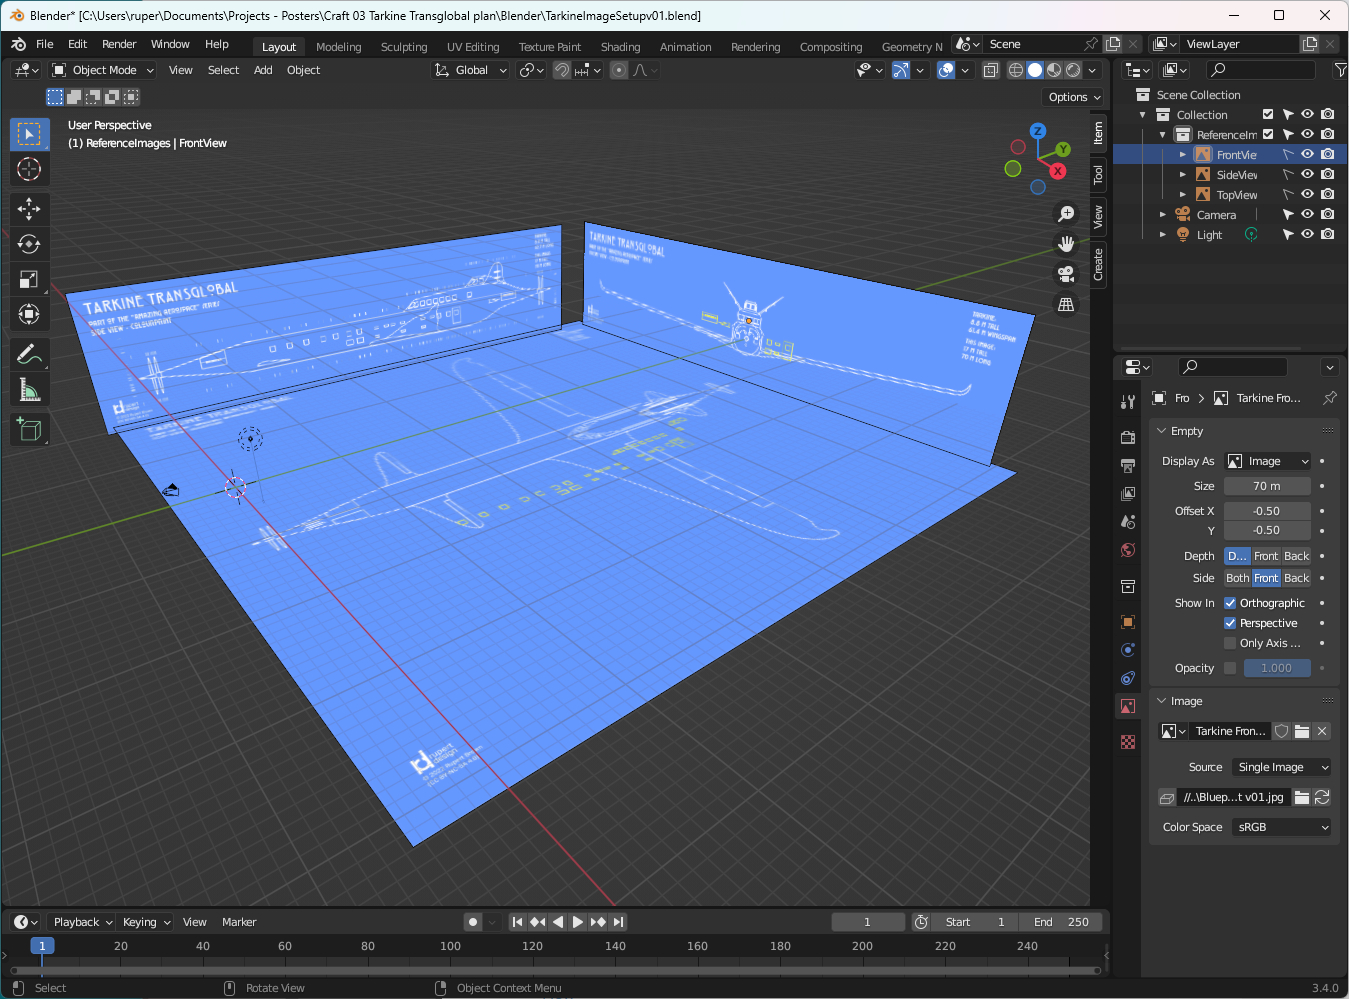
I want to model Tarkine to scale which means making the reference images the right size. To help with this process I put the size the image needs to be in the actual image. Then it is a matter of deciding how the aircraft should be positioned with regards to the axes. I've put Tarkine's nose at the 0 0 0 origin, and the fuselage along the Y axis.
The Tarkine blueprints are available here.
Ink and pencil - rich pictures
28 January 2023
I put away Blender and Skyluxe for a little while to pursue another idea. I've always been a fan of the rich picture as a way of helping to visualise and thus understand complex problems or systems. Two concepts slipped into my psyche and the only way I could get them to leave was by drawing them out. For some reason the computer didn't seem to be an appropriate medium so I reverted to ink and pencil.

This is showing the significant array of forces and that bear on us as we move through life. People will suffer or benefit from forces to different extents. The only thing to do is to be aware of a situation and take action to make the most of it - easy to say but at times it can feel overwhelming. Planning to move to an "ideal" future state has to be a good thing.
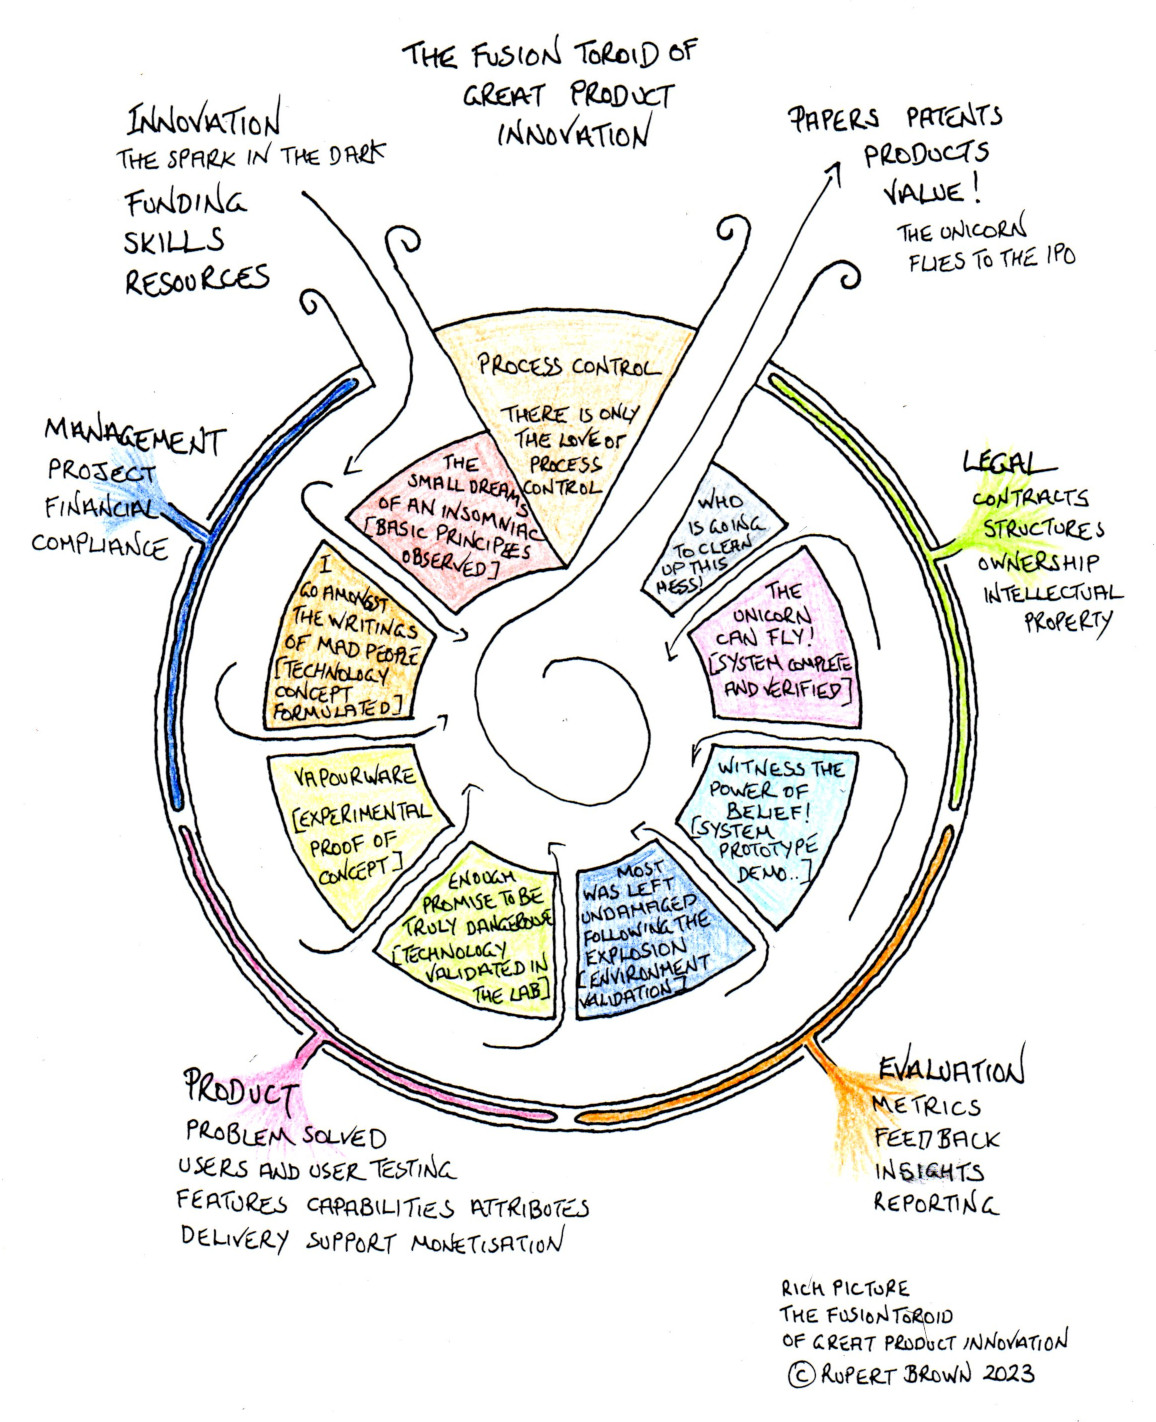
I read several quotes from Steve Jobs about product development and innovation. He made reference to Henry Ford - that people will ask for a faster horse, not realising there was a completely different solution. In that same vein Steve Jobs was very cautious about believing market focus groups on the basis that most people don't know what they want till they see. Most people don't think like great designers or innovators. That said, some truly innovative things have simply crashed and burned, ignored by the market. This rich picture reveals something of the stages that a new product innovation will have to move through before it takes the world by storm.
Materials and rendering
10 January 2023
In Blender Adventures I talk about the process I went through to turn Skyluxe into a 3D Blender model and finished with the statement that it was time to go off to the paint shop. The Summer break gave me some time to do just that. Blender offers a fantstic number of tools to develop models. It has an equally rich offering when it comes to materials and rendering. I feel like my journey is just beginning, but I have managed to get an outcome which is a good first step.
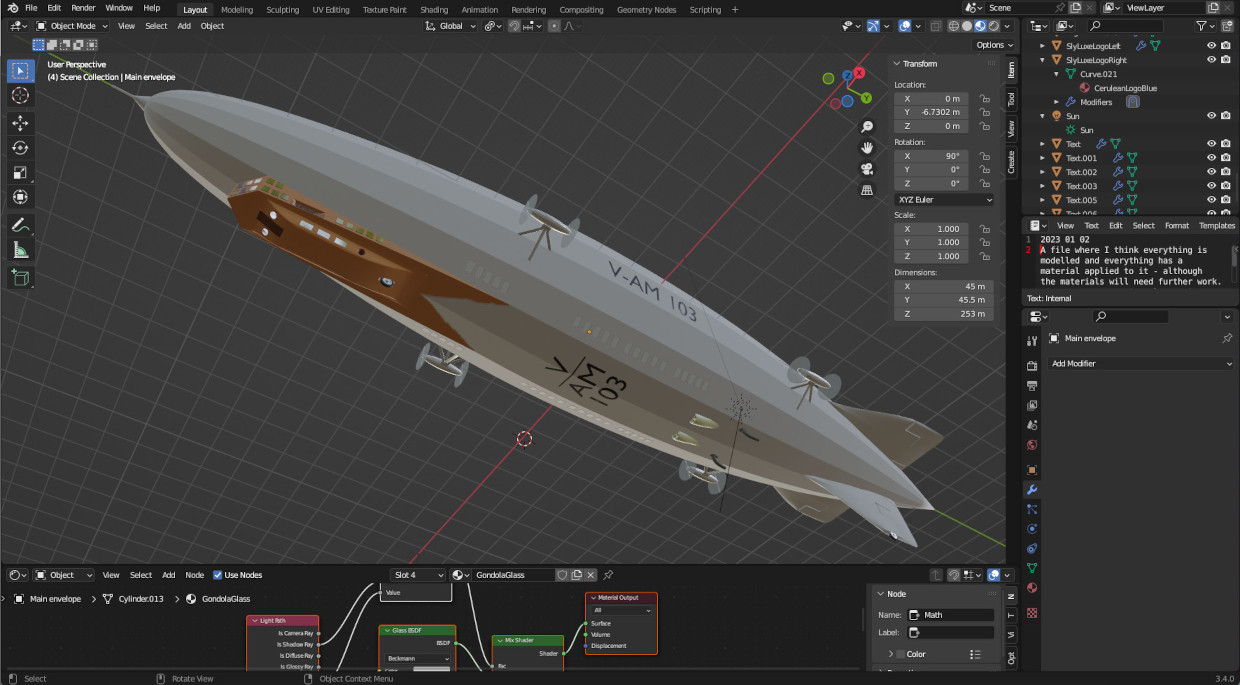
Every part of the airship is now linked to an appropriate material. Over time I can come back and refine and improve those materials. The point of developing 3D models is to help me with the next set of posters. A 3D model can be used to render any number of images using different backgrounds and settings. I tested the workflow and came up with the image below. It is very rough and ready but shows me the potential of the process.
Library exhibition
8 October 2022
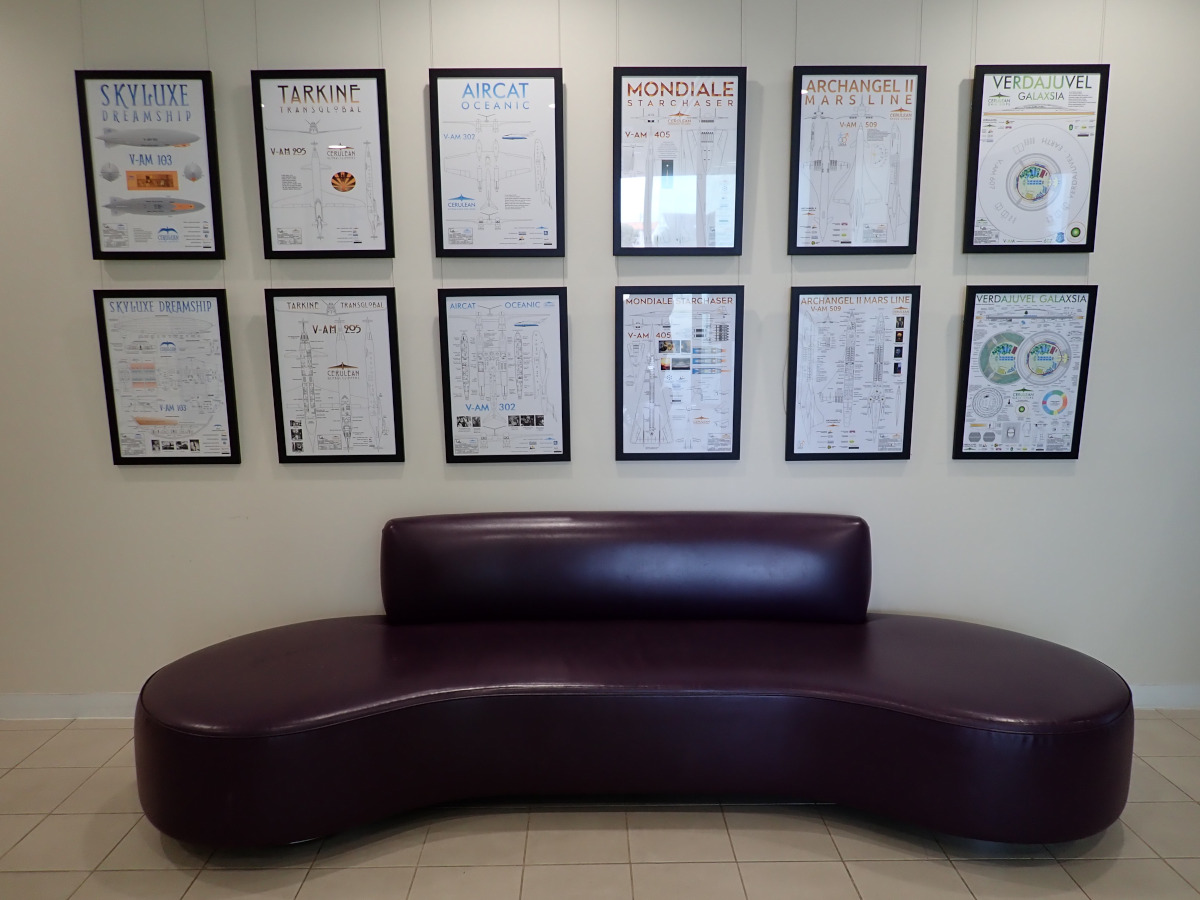
"Amazing Aerospace" happened! It was great to see the posters up in a public space, and I did witness a couple of people studying them with what looked like curious interest. To be fair they are quite complex works - not things that lend themselves to casual glancing. Many thanks to Michael and Bridey from the Arts and Culture Team, Mornington Peninsula Shire. What next? Where next?
Archive 02
Archive 03
Archive 04
Back to top